Need to enable WooCommerce user approval in WordPress user registration forms? If so, this article on how to approve new user registration in WooCommerce is for you.
Moderating user registrations should be a top priority for those who want to keep their WooCommerce store exclusive to a few. You can keep only genuine and relevant customers on your eCommerce site by manually approving or declining each new registration.
However, this feature is not available in WooCommerce’s native settings. So, you’ll have to use a third-party plugin like User Registration.
That’s why we’ve prepared a guide you can follow to approve users in WooCommerce using the User Registration plugin. Interested? Read ahead to learn more.
Default WooCommerce Registration and User Approval
Well, you do get a user registration and login form in WooCommerce, but with a few glaring limitations.
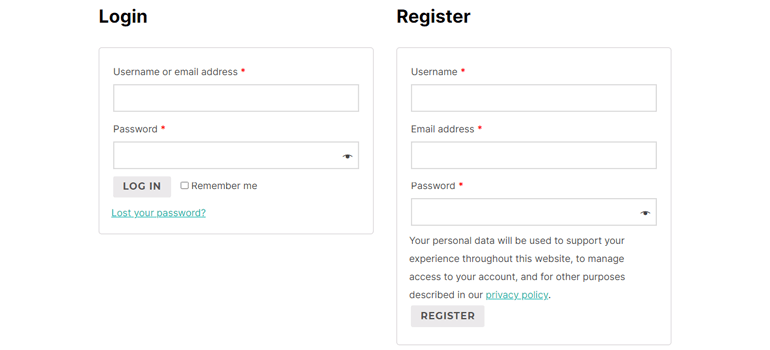
First of all, you can’t enable admin approval for front-end registrations in WooCommerce’s native settings. After a user registers in WooCommerce, their account is automatically verified.
The next setback is that you can’t add custom fields like shipping and billing addresses to the registration form. Customers can only enter this information during checkout or from their dashboard. Making customers fill these fields during checkout might deter them from actually completing the purchase.
But there’s a way you can easily overcome these drawbacks.
Best Way to Enable WooCommerce User Approval by Admin in Registration Forms
WooCommerce may not allow admin approval in its registration forms, but User Registration does. User Registration is a WordPress plugin that lets you build custom registration forms with its beginner-friendly drag and drop form builder.

So, you’ll be able to manually approve each user registration on your WooCommerce site and use custom forms instead of the default WooCommerce registration.
Besides, it also provides a separate WooCommerce add-on that lets you add shipping and billing address fields to your registration forms.
But that’s not even all of it. Here are some more benefits to reap out of this awesome WordPress plugin:
- Customize email templates for both admin and users
- Beautiful user profile account page
- Assign user roles through registration forms
- Strong spam protection with Google reCaptcha and Honeypot
- Accurate statistics on user registrations
So, there’s no doubt that the User Registration plugin is the best way you can approve users in WooCommerce.
Now, without further delay, let’s jump right into the step-by-step tutorial for you on WooCommerceuser approval in registration forms using User Registration.
How to Enable Admin Approval in WooCommerce User Registration Forms?
We assume that you already have the WooCommerce plugin installed on your website. If not, you should create an eCommerce website using said plugin before proceeding with the following steps.
1. Install User Registration Plugin and WooCommerce Add-on
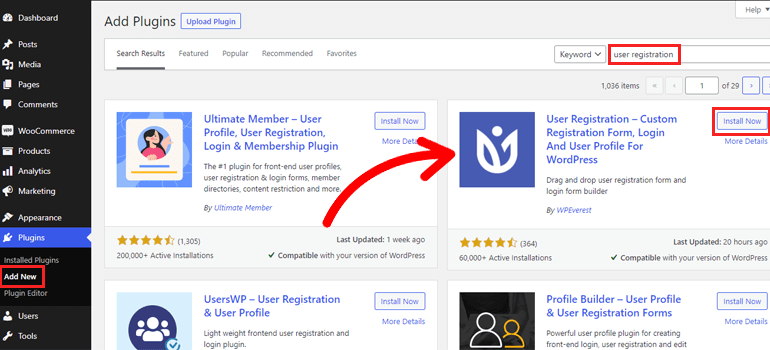
Installing User Registration on your website comes before anything else. It’s as easy as searching for the plugin in the Add New section of Plugins in your WordPress dashboard and clicking Install Now.
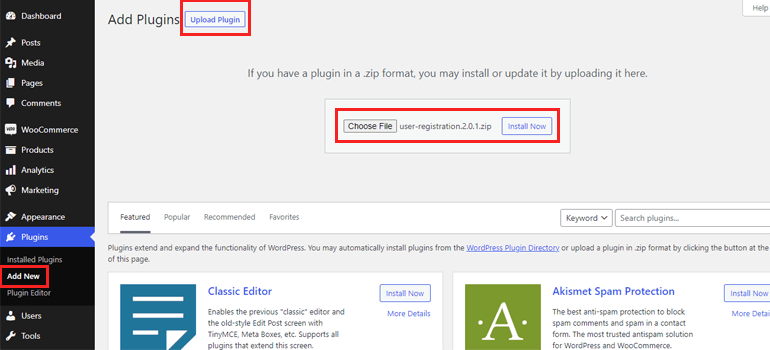
Or, you could just download the plugin from the official User Registration WordPress.org page and upload it from the Add New section.
Don’t forget to activate User Registration to complete the installation process no matter which method you choose.
Also, select the Install User Registration Pages option at the top of the page to get sample Registration and My Account pages. You can use these pages instead of creating a new one from scratch.
2. Allow Users to Register with a Front-end form
Next, you should allow users to register using a front-end registration form. You can do this from the General tab under Settings.
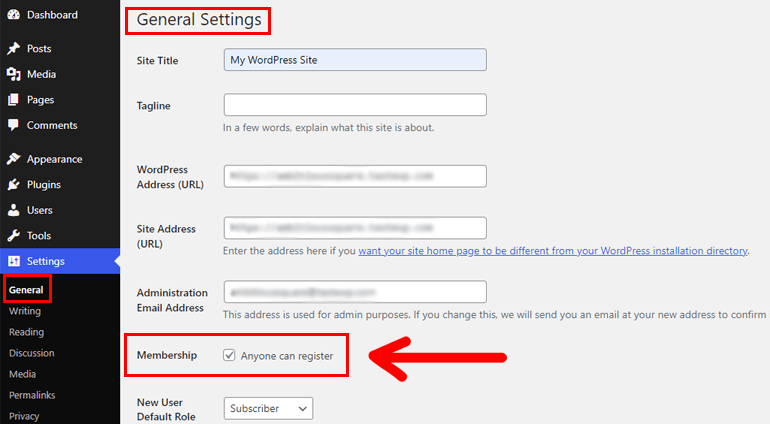
You’ll find the Membership option here, which is turned off by default. This makes it so that your users cannot access a front-end registration form.
By ticking the checkbox next to Anyone can register, you’ll be making your registration forms visible to them.
After you’re done, click Save Changes at the bottom of the page.
3. Create a New Custom WooCommerce Registration Form
Now, it’s time to create a custom WooCommerce registration form. This is mandatory because you cannot apply the admin approval settings to the default WooCommerce user registration form.
You can only approve users through the custom WooCommerce forms you create with User Registration. So, let’s get started.
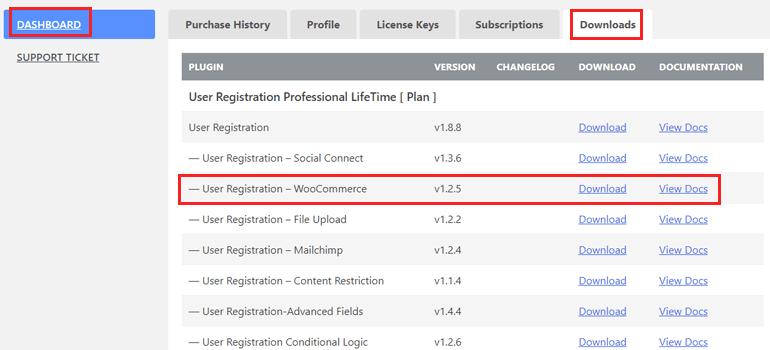
Note that you’ll need the WooCommerce add-on that is only accessible with a premium account. So, head on over to User Registration’s pricing page and buy a premium plan. Then, log into your premium account and download the add-on from the Downloads section of the account dashboard.
After that, install it on your WordPress site following the steps we discussed above.
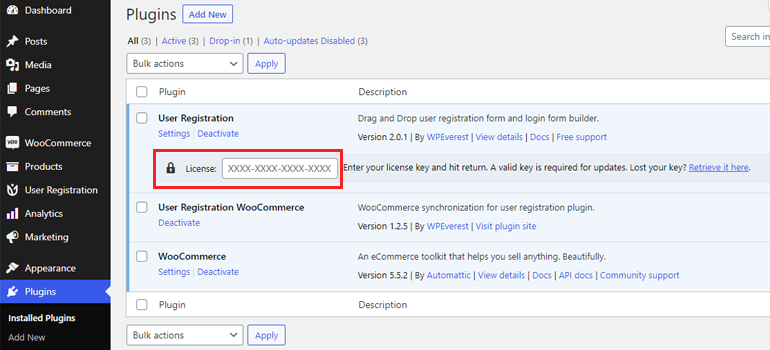
On the Plugins page, you’re asked to enter the license key under User Registration. We recommend you do so to enable regular updates for the plugin and its add-ons.
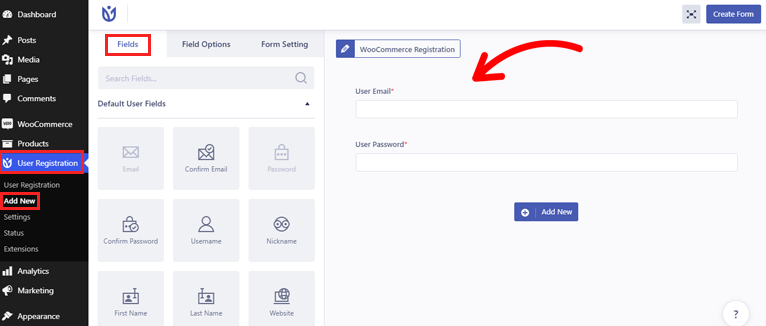
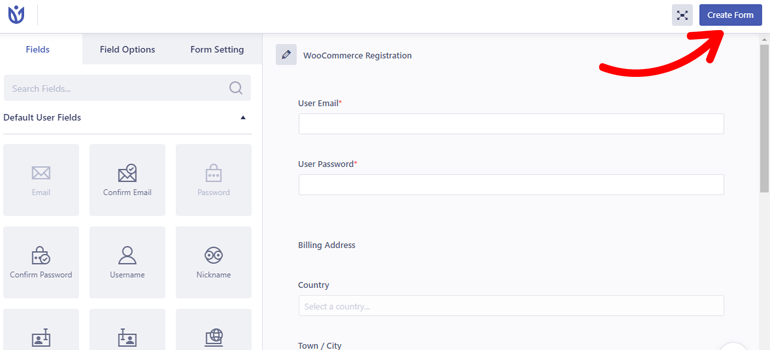
Once that’s done, go to the User Registration tab and click on Add New. As you can see, the form builder has all the available form fields on the left and the actual form on the right.
If you scroll down in Fields, you’ll find all the WooCommerce Billing and Shipping Address fields you might need like Company, Postcode/ Zip, Phone, Address 1, Address 2, and Country.
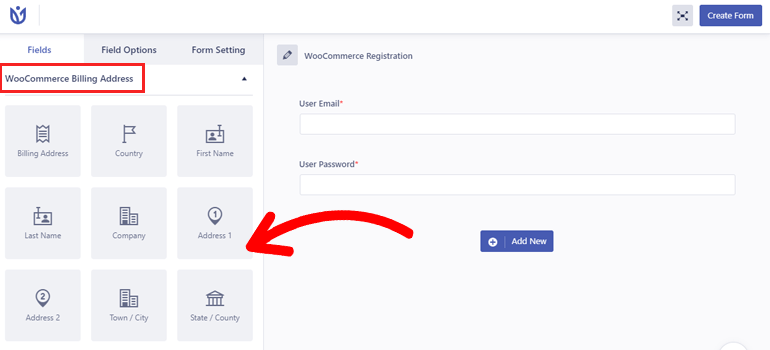
All you have to do is drag and drop the required fields into the form.
When you’ve completed building the form, press the Create Form button at the top left corner of the builder.
4. Customize Your WooCommerce Registration Form
The next step in the process is to customize the registration form you just created. Simply click on the field you want to edit, which takes you to its Field Options.
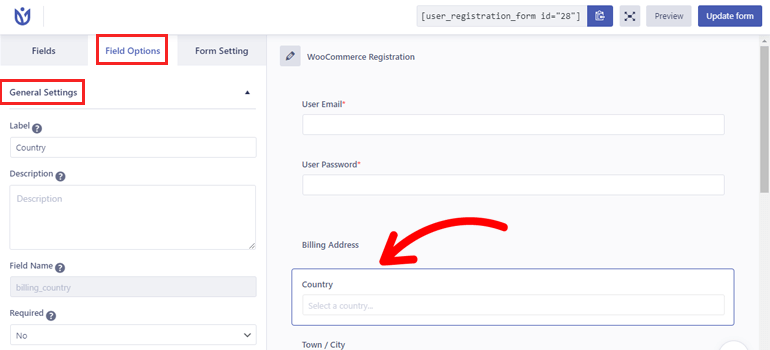
Here, you’ll be able to change the field Label, Description, and Placeholder from the General Settings. You can also set the field as Required and hide the label.
Similarly, Advanced Settings allows you to add custom classes to the fields. Better yet, there are some extra options for specific fields like Country, where you can choose which countries to display in the dropdown.
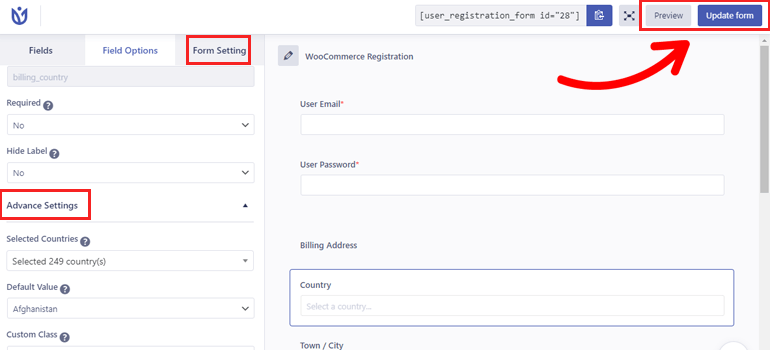
Then, hit the Update button as soon as you’re done making the changes.
You can also view what the form looks like to your customers with the Preview button.
5. Enable Admin Approval after Registration
Now, here’s the most crucial part of this tutorial. You still need to enable admin approval in this custom WooCommerce user registration form.
You can do so from the User login option in the Form Setting. Just select Admin approval after registration from the dropdown and click Update.
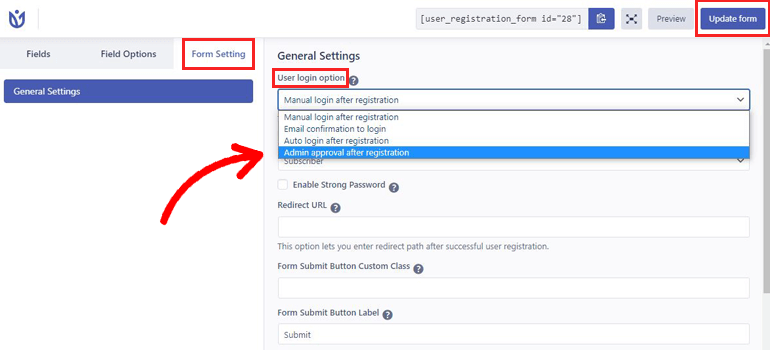
This makes sure that only the site admin is able to approve or reject new registrations. The registered users will stay in a pending status and can’t log in until they’re approved.
If required, you can also configure more settings like enabling strong passwords, assigning default user roles, and so much more.
6. Replace Default WooCommerce Registration Form with the Custom Form
Finally, you must replace the default WooCommerce registration form with your custom form. Otherwise, your customers will continue registering through the default form with no way for you to moderate the new users.
So first, go to Settings under the WooCommerce tab. In the Accounts & Privacy section, you’ll see an option called Account Creation. Turn on the Allow customers to create an account on the “My Account” page option if you haven’t already.

This allows customers to register through front-end WooCommerce registration forms. Now, go back to User Registration’s Settings and open the WooCommerce tab.
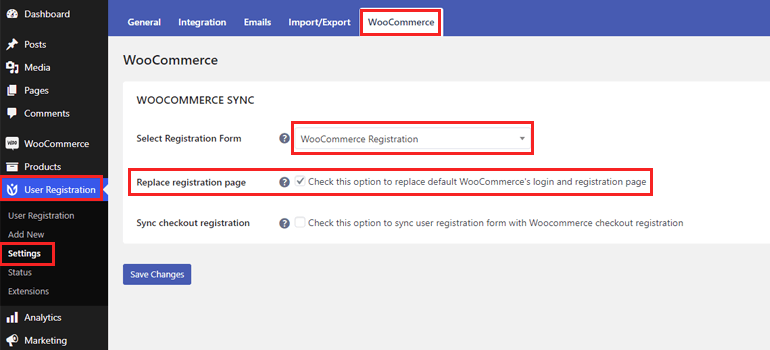
Select the custom form you just made from the dropdown. Once you’ve done that, tick the Replace Registration Page option and Save Changes.
Now, your website will display the User Registration login and registration form instead of the default forms. Plus, the shipping and billing address fields will be automatically filled with the data from this form during checkout.
Regarding the account pages, User Registration and WooCommerce both have My Account pages, which may cause conflict. You can choose the user account in User Registration as the main My Account page to avoid this.

To do that, navigate to WooCommerce’s Settings and open the Advanced tab. Simply set the My account page to User Registration’s My Account.

And with that, you’re done!
Wrapping Up
That brings us to the end of our quick tutorial on enabling WooCommerce user approval by admins in registration forms. The default WooCommerce registration doesn’t facilitate this feature, so you’ll have to use WordPress plugins like User Registration.
However, this only activates user approval for the custom WooCommerce registration form built with User Registration itself, not the default one.
If you want to approve users through the default form, try admin approval plugins like WordPress & WooCommerce Approve New User Registration instead.
Besides, you’re free to explore more WooCommerce registration form plugins if making custom registration forms is your priority.
If you find this article helpful, you can always visit our blog for more. Also, follow us on Twitter and Facebook to get updates on new articles and product releases.


![Zakra 3.0 | Zakra Pro 2.0 Release [Major Updates!]](https://i.ytimg.com/vi/g3rifl7kWvg/maxresdefault.jpg)