Are you wondering how to create user profile page in WordPress? If so, you’re in the right spot.
In this article, we’ll be discussing the benefits of having a custom user profile page on your WordPress website, and how to create one in detailed steps.
So stick with us till the end!
Why Create a Custom User Profile Page in WordPress?
WordPress provides you with the ability to create new user profiles and edit user info manually from the backend.
However, it lacks the feature where users can edit their user profile from the frontend. This is why having a custom WordPress account page is necessary for a website.
With the proper WordPress plugin, you can create one easily in minutes and add it to your website. The right one gives you more power of customization options.
Users can personalize their account page according to their preferences by adding their picture, bio, and valuable information.
As a website owner, you can also get a bunch of information from your users that you can use for your benefit.
In a nutshell, online businesses can benefit the most by having a custom user profile page on their website.
On top of all that, it improves the user experience on your website.
Now without any further ado, let’s jump to steps that can help you create a user profile page in WordPress effortlessly.
How to Create User Profile Page in WordPress?
Step 1. Choose a Frontend User Profile Plugin
The first step is to choose a feature-rich plugin that allows you to create a custom user profile page in WordPress.
There are many WordPress frontend user profile plugins out there. However, we recommend you choose the User Registration plugin.
It’s one of the best WordPress plugins out there to create amazing custom user registration forms for your website.
You can create any type of registration form easily by dragging and dropping fields into the form.
User Registration also has a bunch of pre-built templates that you can use. You can customize them as per your preferences.
Mainly, it offers an option to create a My Account Page for your site with a shortcode. You can even customize the My Account Page according to your requirements.
This is why we’re using this plugin in this tutorial.
Step 2. Install User Registration and Add-ons
As mentioned above, User Registration is the perfect choice for creating registration forms and managing users.
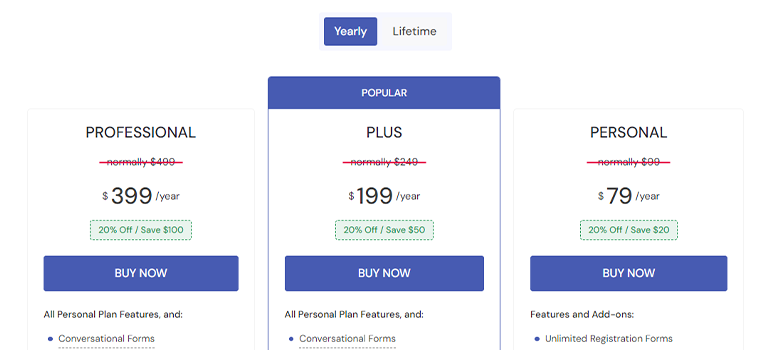
It’s a powerful plugin that you can download at no cost. However, to unlock its full potential, we highly suggest you purchase the premium plans.
Also, to create a custom user profile page, you need to buy its Plus or the Professional plan. Thus, visit the official pricing page and purchase a suitable plan for yourself.
After that, you can install, activate, and configure the plugin.
You can find a detailed guide on installing and setting up the User Registration plugin here.
After you’ve finished the installation and setup process, head on over to the Extensions section from the User Registration menu.
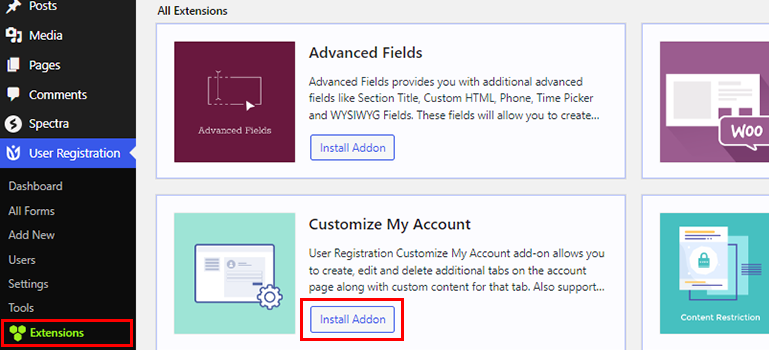
There, you need to install the Customize My Account add-on to your site.
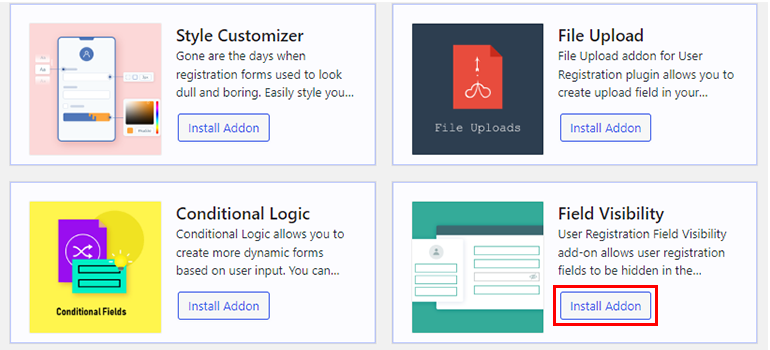
You can also get the Field Visibility add-on for hiding certain fields in the user profiles.
Step 3. Creating My Account/User Profile Page
Once you are done installing User Registration Premium and the above-mentioned add-ons, you can start creating your custom user profile page.
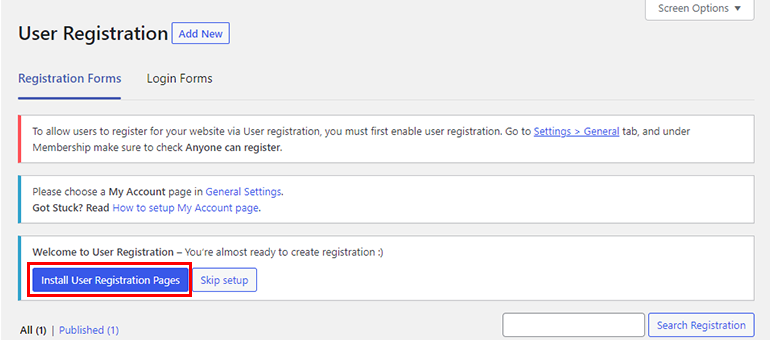
If you’ve completed the setup process earlier, the plugin automatically creates a My Account page for you.
However, in case you skipped it don’t worry, you’ll find the option on the User Registration’s All Forms section.
You can also create it yourself if you want. All you need to do is insert this shortcode to your editor:
[user_registration_my_account]Go to Pages → Add New and add your title. Then, you can insert the shortcode into the text editor and publish the page.
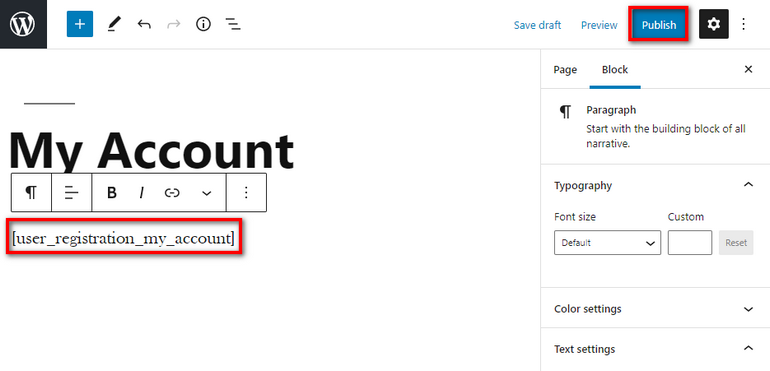
After you publish the page, you can view the user profile on the front end of your site.
The User Profile page contains four tabs by default. They are Dashboard, Edit Profile, Edit Password, and User Logout.

Step 4. Customize User Profile Page Tabs
You can make changes to your My Account Page with the help of the Customize My Account add-on.
You can add additional tabs to the user profile manually but the add-on makes it so much easier.
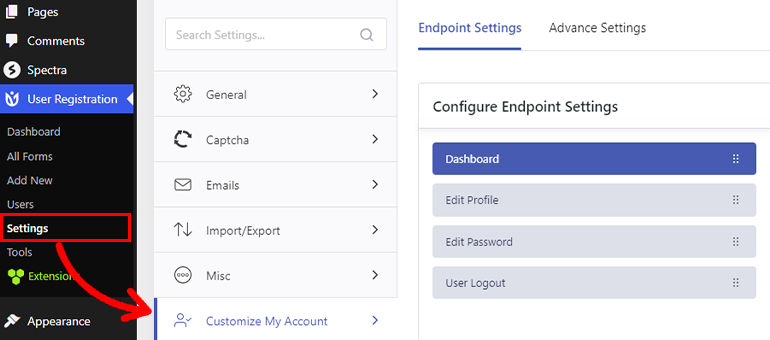
After you install and activate this add-on, go to the User Registration → Settings tab.
Then, click on the Customize My Account section and you can view existing tabs and their settings.
i. Add New Tabs to the Custom User Profile:
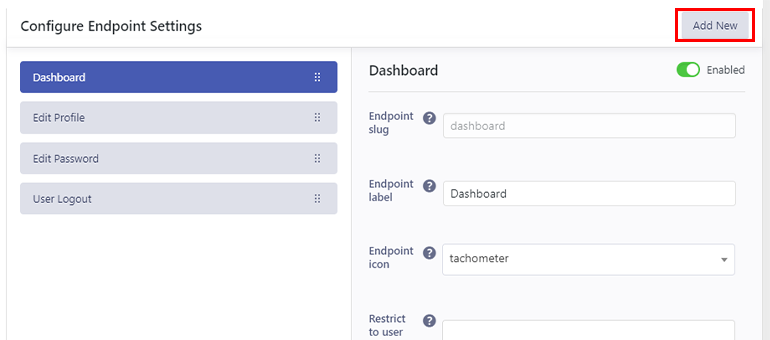
You can add additional tabs to your user profile page with a click of a button. Just click on the Add New button at the top right corner.
Here, you’ll get two options. Select the type of field you want to add.
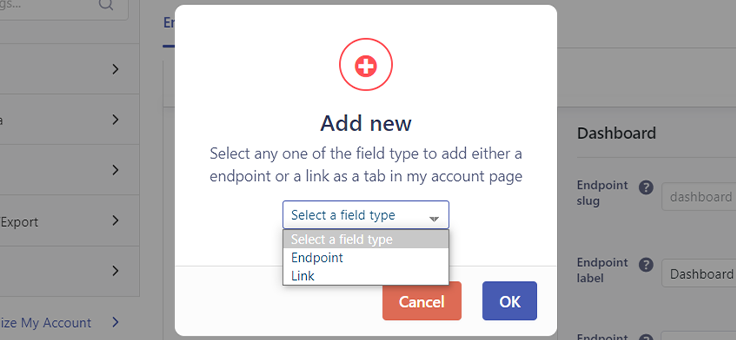
After selecting, click OK. Then head down and press Save Changes.
ii. Edit Tabs on the User Profile Page:
You can edit the fields and elements of each tab of the user profile or My Account page. Since there are two field types, their settings are different.
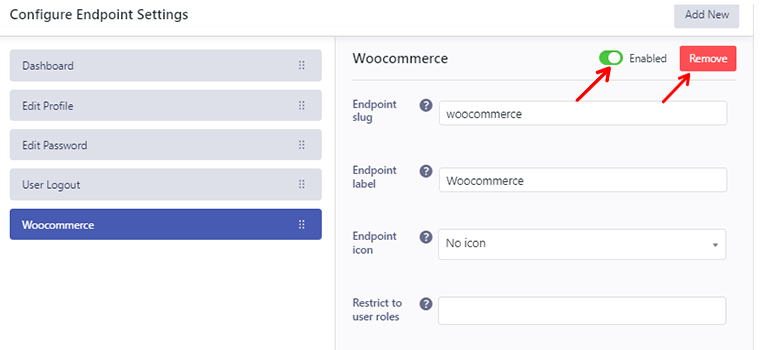
First, let’s view the settings for the Endpoint.
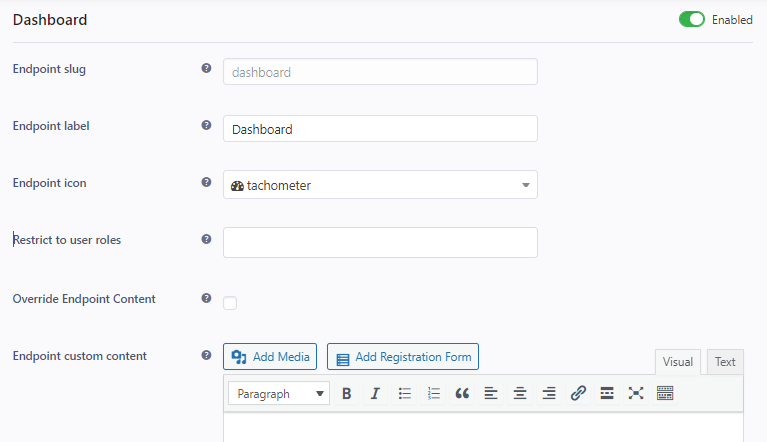
Here you can view Endpoint Slug, Endpoint Label, EndPoint icon, Restrict to user roles, Override Endpoint Content, and Endpoint Custom Content.
Contrarily, Links have settings of their own. Here, we’ve created a link tab and named it “WooCommerce”. Its settings are as follows:
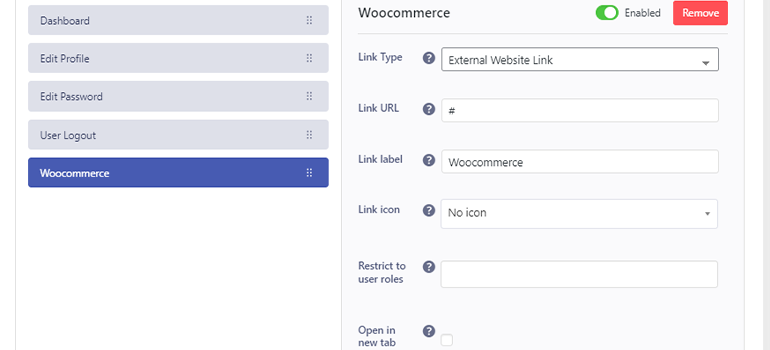
You can find settings for Link Type, Link URL, Link label, Link icon, Restrict to user roles, and the option to open the link in a new tab.
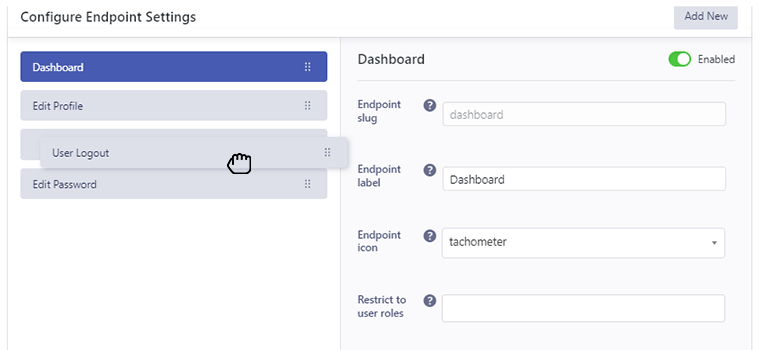
iii. Manage User Profile Tabs:
You can change the position of the tab by simply dragging and dropping the tab to the desired position.
iv. Disable and Delete User Profile Tabs:
To hide a tab you can just turn off the Enabled option for the tab. Also, you can easily delete a tab if you don’t need it.
Step 5. Create a Custom User Profile Page
After you make changes to the User Profile page tabs, you can edit the design and style of the page.
For this, you need to go to the Advance Settings in the Customize My Account tab.
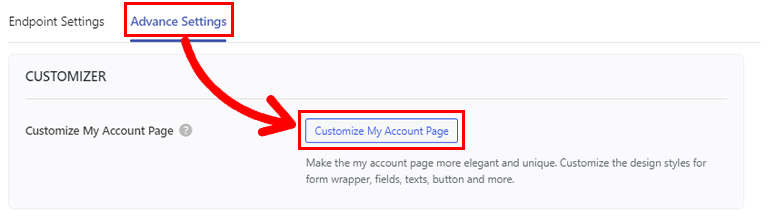
Then, you can click on the Customize My Account Page button. Then, you will be redirected to the live editing panel which is similar to the WordPress customizer.
There are 6 editing tabs which include Wrapper, Color, Navigation, Forms, Buttons, and Additional CSS.
You can change the styling of your User Profile page as per your requirements from these tabs and make them unique.
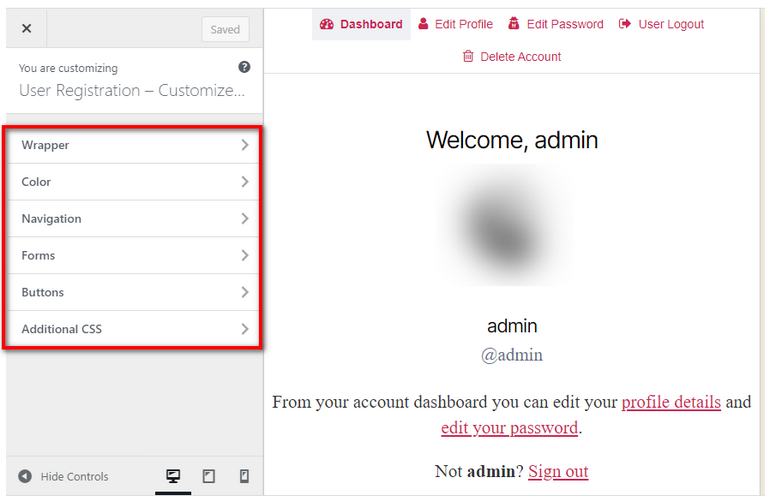
Once you are done, you can save the changes.
Step 6. Hide User Profile Details
Another great feature that User Registration offers is Field Visibility. The Field Visibility add-on allows you to hide the user details on the User Profile or Registration Form.
After you install the premium Field Visibility add-on, open your registration form or create a new registration form.
You can choose which field you want to hide in the User Profile Page and edit the settings. Here, we are hiding the Secondary Email field.
In the Field Options, you can see the various options like Label, Description, etc. There are also Visibility Settings which include two options: Show on and Enable Read-only.

In the Show on option:
This setting allows you to show/hide certain fields on your pages as you wish.
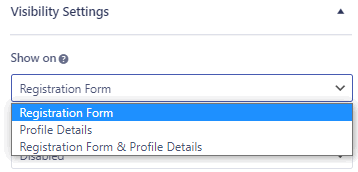
There are three options: Registration Form, Profile Details, and Registration Form & Profile Details.
- The Registration Form option will show the field only on the Registration Form.
- The Profile Details option will display the field only on the Profile Details page.
- The Registration Form & Profile Details will show the field on both the registration page and the profile details page.
Here, we’ll select the Registration Form option since we’re hiding the field on the User Profile page.
In the Read-only option:
This option allows you to make the field viewable but uneditable by the users in the frontend.

Here, you’ll find four different options: Disabled, Registration Form, Profile Details, and Registration Form & Profile Details.
If you wish to make the field uneditable, this section is useful.
- The Disabled option will allow changes to be made to the field.
- The Registration Form option will show the field on the Registration Form but it can’t be editable.
- The Profile Details option will show the field on the Profile Details page but it can’t be editable.
- The Registration Form & Profile Details option will show the field on both the Registration Form and Profile Detail pages but it can’t be edited on both the pages.
Once you’ve chosen the options save the changes you made and you’re good to go.
Summing it Up!
With all this information, we’ve now come to the end of the article.
On the way, we’ve learned how valuable it is to create a user profile page in WordPress, and how to create a custom one with the help of the User Registration plugin.
We’re sure you also gathered the potential of User Registration. It lets you create and customize user profile pages easily in minutes.
If you’re looking to build an online store website, we’re sure you’re looking to enable user registration in WordPress. This article will help you do so with the User Registration plugin.
Good luck and best wishes in creating user profile pages for your WordPress website!
Also, don’t forget to follow us on Facebook and Twitter to get exciting news on User Registration.


![Zakra 3.0 | Zakra Pro 2.0 Release [Major Updates!]](https://i.ytimg.com/vi/g3rifl7kWvg/maxresdefault.jpg)