
It’s a given that you must know the WordPress login URL to access the admin panel of your website. But if you’re a beginner, it’s very likely to get confused about how to log in to WordPress.
That’s why we’ve prepared this complete guide on WordPress login. By the end of this article, you’ll learn where you can find the WordPress login URL.
Besides that, we’ll also explore the ways you can manage your site’s login URL. And if you’re experiencing some login page issues, we’ll address that as well.
So, let’s jump right into the article without delay.
A. How to Find the WordPress Login URL For Your Website?
The WordPress login URL is pretty easy to find. However, the URL might change depending on whether you’re logging into the main domain, subdomain, or subdirectory website.
Let’s go through each scenario to help you find the correct login URL for your WordPress website:
1. How to Login to the Main Domain Website?
The URL for your main domain website looks like this:
www.example.com
Now, the login URL usually consists of an additional phrase, wp-admin, at the end of the main website URL. Hence, your login URL for the main domain website is:
www.example.com/wp-admin
All you need to do is type this URL into the browser and hit enter. You’ll arrive at your website’s WordPress login page.
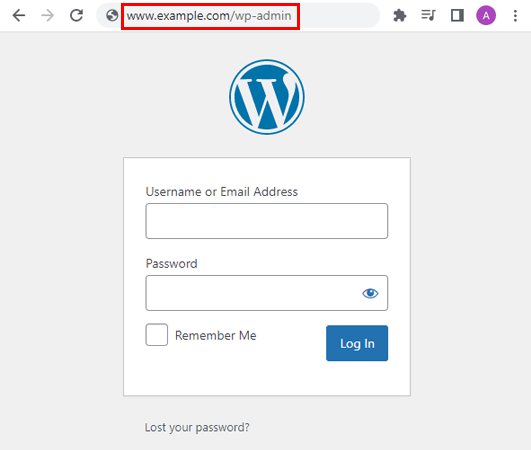
Therefore, you can now log in and access your admin panel immediately!
Note: The format of the login URL is the same for most main domain websites in WordPress.
2. How to Login to a Subdomain Website?
Besides the main domain, your website may also have a subdomain. For example, your website may have its product documentation in a separate subdomain.
And how do you log in to this subdomain website? Well, it’s quite similar to logging into a main website.
The URL for a subdomain website follows the given format:
www.subdomain.example.com
Hence, the login URL for this subdomain website will be:
www.subdomain.example.com/wp-admin
As simple as that!
3. How to Login to a Subdirectory Website?
Similar to a subdomain, a website also usually has a subdirectory. An example would be a website containing a separate page for its blogs.
Thus, the website URL for a subdirectory such as ‘blog’ would be:
www.example.com/blog
And the login URL for this subdirectory website is:
www.example.com/blog/wp-admin
Simply add the wp-admin phrase to the URL, and you’ll be taken to your login page.
B. How to Remember your WordPress Login URL?
Once you’ve logged in, you can access your website’s admin panel. But before you start any task, you might want to save the WordPress login URL.
This way, you won’t have to keep typing the URL every time you try to log in.
The first and simplest way of remembering your WordPress login URL is by bookmarking the login page in your browser.
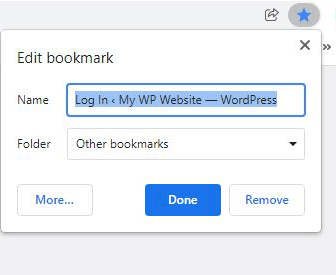
Then, you can find the URL in the Bookmarks folder.
Alternatively, you can also add a link to the login page in your website’s navigation menu. Hence, you can click the menu instead of typing the URL manually.
For this, go to Appearance >> Menus in your WordPress dashboard. Here, you can create a new menu if you don’t already have one.
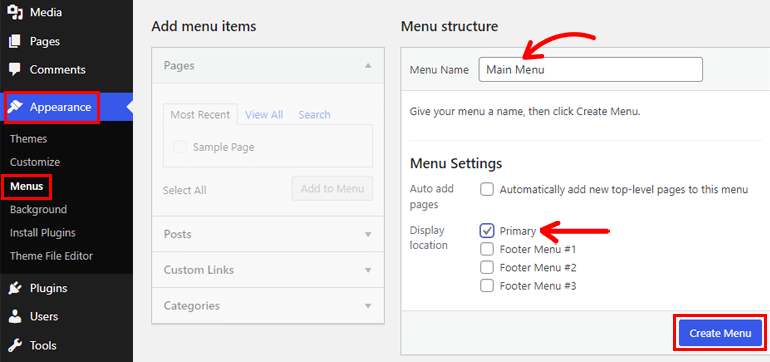
Note that menus can vary depending on the theme you’re using.
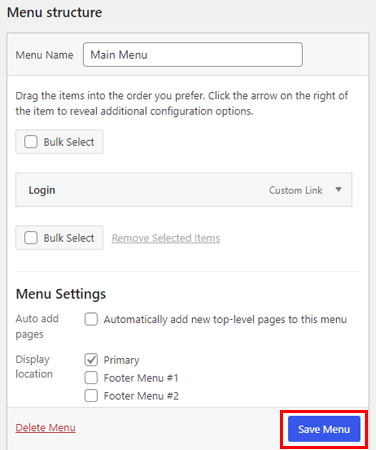
In the Menu Structure section, enter a menu name like Main Menu.
Tick the checkbox for Primary Menu since you want to display the menu in the main location i.e. the header section. Finally, click Create Menu.
Then, in the Edit Menus tab, you’ll see a section titled Add menu items.
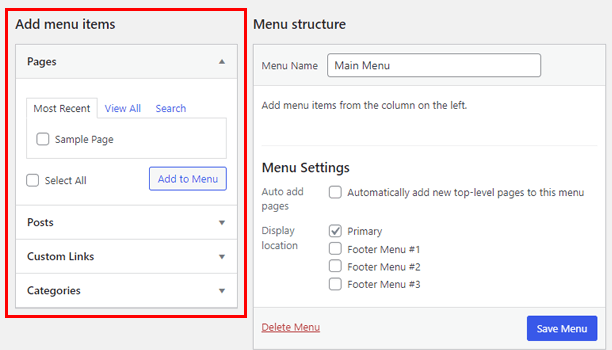
Here, click on Custom Links and add the login URL in the URL field. After that, provide a Link Text and press Add to Menu.
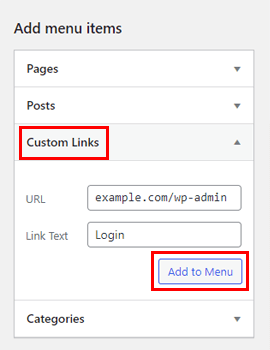
Finally, hit the Save Menu button.
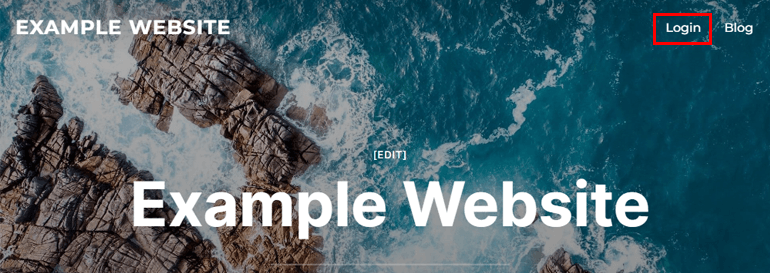
Your navigation menu will now display the Login link at the top. You can just click on the menu to go to the login page.
C. How to Protect Your WordPress Login Page?
As we’ve explained in the sections above, a website owner or admin can easily find the login page URL of their website.
The same can be said for users with malicious intent. The fact that your login page is so accessible puts your website at risk of hacking and malware attacks.
That’s why you must implement some measures to protect your WordPress login page.
Wondering how? Here are a few easy tips you can apply immediately to secure your login page URL.
1. Change the Default Login Page URL to a Custom One
The first way of protecting the login page URL is by changing it to a custom one.
Basically, you replace the default URL with a custom URL. This makes it harder for hackers to crack down on your login page.
However, WordPress doesn’t facilitate this feature by default. You’ll have to use a third-party plugin to create a custom login page URL.
And the best plugin you’ll find for that is User Registration.
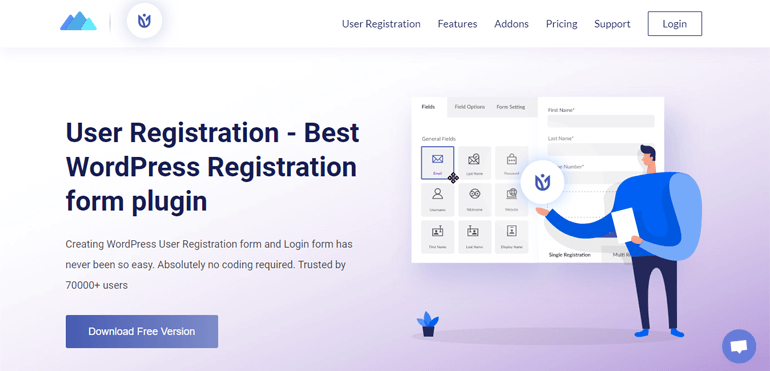
This free registration plugin helps you build custom registration and login forms in minutes. Moreover, you can create a custom login page and replace the default login page with it. No coding is needed at all!
We’ll go through the step-by-step process of creating custom login page URLs in the next section. So, stick around if you don’t want to miss out!
2. Hide the Login Page URL
We talked about changing the WordPress login URL as the first tip. What if we told you that you could also hide the login page URL?
Yes, you’ll find several WordPress plugins that allow you to hide the default login page URL without coding.
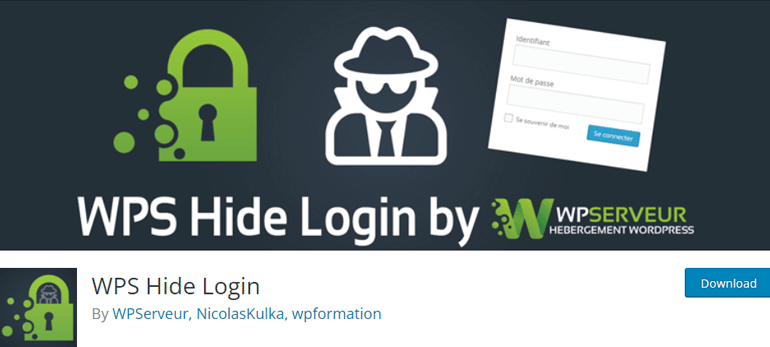
For example, you have the WPS Hide Login plugin. It’s a free tool that lets you create a new login URL.
Thus, users who attempt to log in through the default URL are automatically redirected to a 404 error page.
3. Enforce Logins with Strong Passwords
Another important tip is to use strong passwords during WordPress registration.
Usually, a strong password has more than 6-8 letters. And it consists of numbers, symbols, uppercase letters, and lowercase letters.
There are free tools, like Strong Password Generator, that generate a strong password for you to use.
If you want your users to register with strong passwords as well, try User Registration. It lets you enable strong passwords for the registration forms on your website.
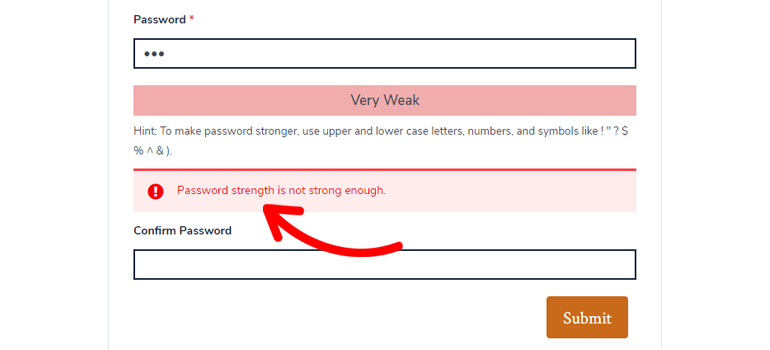
Hence, users will only be able to register when they enter a strong password. This ensures that your website security isn’t compromised because of users with weak passwords.
4. Limit Login and Password Reset Attempts
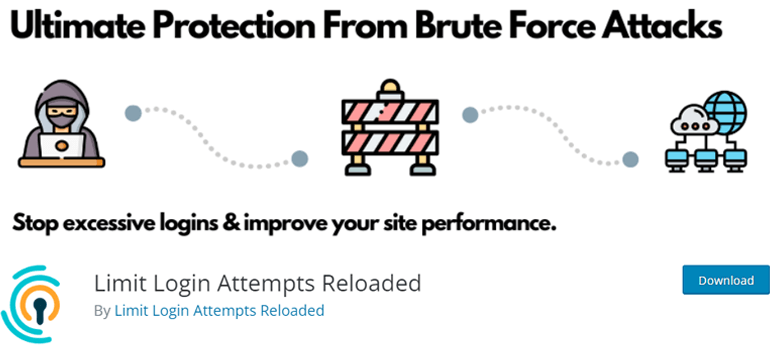
Besides enforcing strong passwords, you must also limit login and password reset attempts. This plays a crucial role in stopping Brute Force Login Attacks.
In simple terms, it stops hacking attempts from malicious users to log into your account numerous times until they’re successful.
A plugin like Limit Login Attempts Reloaded will do the job. You can simply install this plugin and set up the login attempts.
You can select the number of retries allowed and the number of minutes you want to lock the user out. Moreover, you can gradually increase the lockout time.
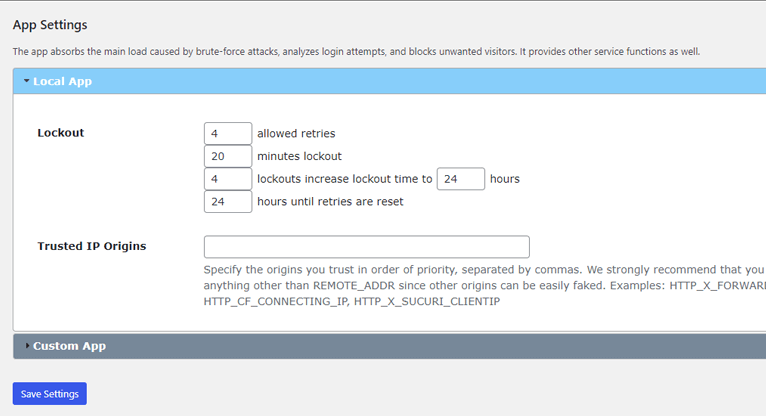
A user can only try to log into their account the specified number of times. If they exceed the limit you’ve set, they’ll be blocked from logging in for some time.
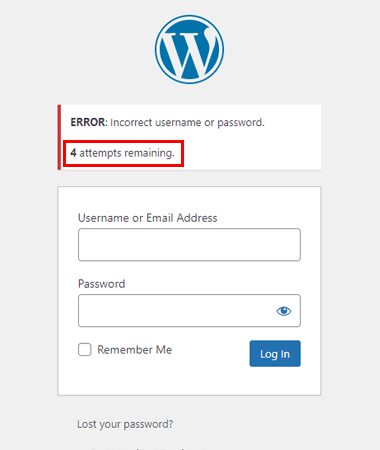
You can do the same with the password reset attempts.
5. Limit Login Session Length
Another security vulnerability is leaving users logged in for an indefinite length of time. It leaves your site open to unauthorized access.
Therefore, your site must log users out automatically after a certain time has passed.
You need to set the login session length, after which the users will be logged out of the website. They must then re-authenticate by providing login details before accessing their account.
6. Upgrade from HTTP to HTTPS
An HTTP or HyperText Transfer Protocol is a protocol that transfers data between a browser and a website.
HTTPS or HyperText Transfer Protocol Secure is the secure version of the same protocol. Along with SSL (Secure Socket Layer), it uses encryption for safe data transfer.
A website with HTTPS protection displays a lock icon in the URL. For example, the official WPEverest website has the lock icon in its URL.
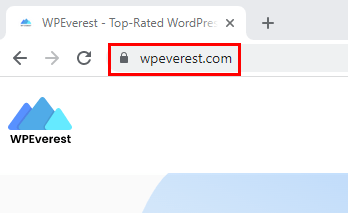
That’s why we recommend switching to HTTPS if your website uses HTTP. This way, you can protect the login page from external attacks during data transfer.
Need help with upgrading to HTTPS? Check out this guide on adding SSL and HTTPS to your website.
7. Secure Your Site with WordPress Security Plugins
Our final suggestion for you is to use a good WordPress security plugin. It provides your entire website, not just your login page, with top-notch protection.

WordPress has a plethora of options you can choose from, such as Akismet, Wordfence Security, Sucuri Security, etc.
They include spam block, brute force attack prevention, firewall security, and more features for all-around protection.
D. How to Create a Custom Login Page URL in WordPress? (In 4 Steps)
As we discussed before, changing the default login URL helps secure your login page. One way to do so is by creating a custom login page URL and replacing the default one.
For this, you’ll need a registration and login plugin that lets you create custom login pages without hassle.
And User Registration is one of the best when it comes to registration and login.
With this plugin, you can create unlimited custom registration forms. Plus, it comes with an in-built login form and user profile. So, half of the work is already done for you.
And if you own a WooCommerce store, you can add extra fields to the WooCommerce registration and sync the checkout with user registration.
Most importantly, User Registration helps you create a custom login page for your website in four simple steps. So, we’ll use this plugin to demonstrate how you can make a custom login page.
Step 1: Install and Activate The User Registration Plugin
Begin by installing and activating the User Registration plugin on your website. The free version is more than enough to create a custom login page.
However, upgrade to the premium version of User Registration Pro if you need more advanced login options.
For a detailed guide, please read our article on how to install and set up User Registration.
Use the steps presented in the guide as a reference and set up the User Registration plugin.
Whether you choose the free or pro version of this plugin is entirely up to you and your site’s requirements.
Step 2: Create a New Login Page
Next up, it’s time to create a new login page for your WordPress website.
Fortunately, you won’t need to create a separate login form for the page. User Registration already comes with a pre-built login form for you.
Hence, all you have to do is add this pre-built form to a new page and publish it.
To do that, make sure you’re logged into your admin dashboard first. Here, navigate to Pages >> Add New.
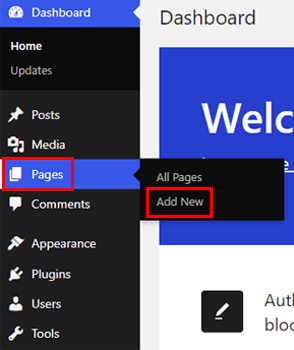
This takes you to the Gutenberg editor where you can design the page as you wish. For example, you can give the page a title like “Log into your account.”
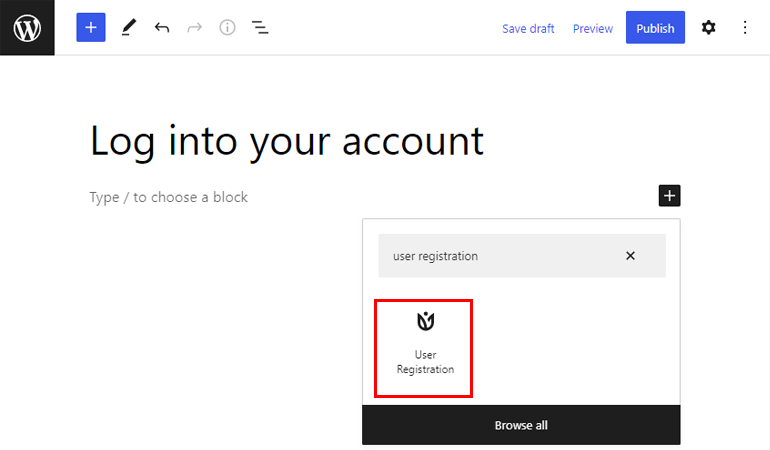
Now, add the User Registration block to the page using the block inserter (+). The block gives you two options: Registration Form and Login Form.
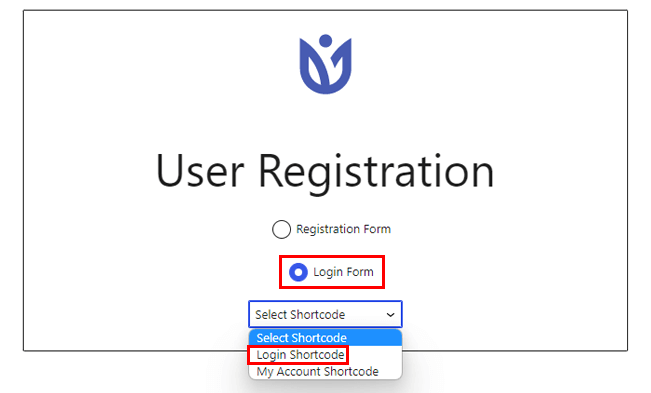
Since we’re creating a custom login page, select the Login Form option. Then, choose the My Account Shortcode from the dropdown.
And you’re done! This adds User Registration’s in-built login form to the page.
However, be careful about the shortcode you choose. The My Account Shortcode redirects users to their profile page once successfully logged in.
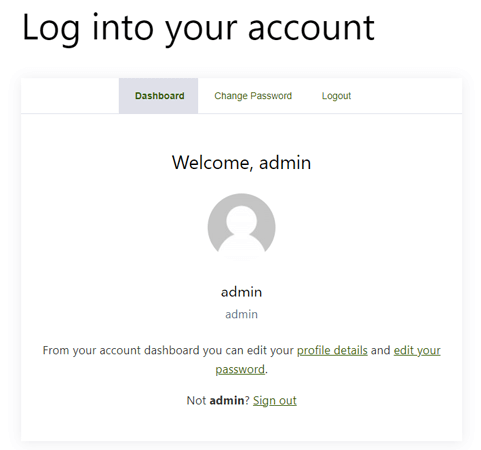
This is not the case with the Login Shortcode. It only displays the login form for the user. You’ll have to manually redirect the user to a specific page after the login is complete.
So, we recommend you work with the My Account Shortcode.
After you’re done designing the page, hit the Publish button at the top.
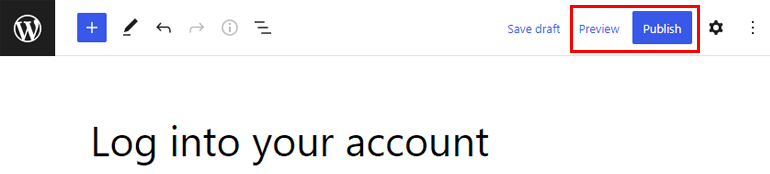
And if you want to check how the login form looks in the frontend, click on the Preview button.
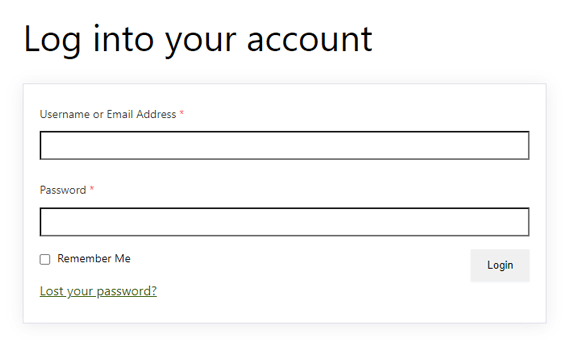
Note: A logged-in user will see their user profile while a logged-out user will see the login form when they open this page.
Step 3: Replace the Default Login URL with the Custom One
You’ve added a new login page to your website. However, the user still sees the default login URL until you’ve replaced it with the custom one.
It’s super easy! First, go to User Registration >> Settings >> Login Options.
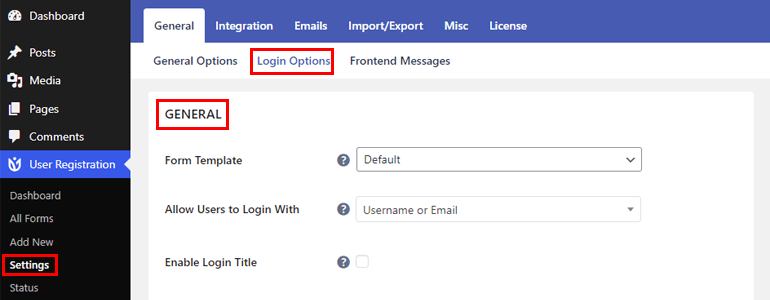
At the end of the General section, you’ll find the Disable Default WordPress Login Screen option. Tick the checkbox.
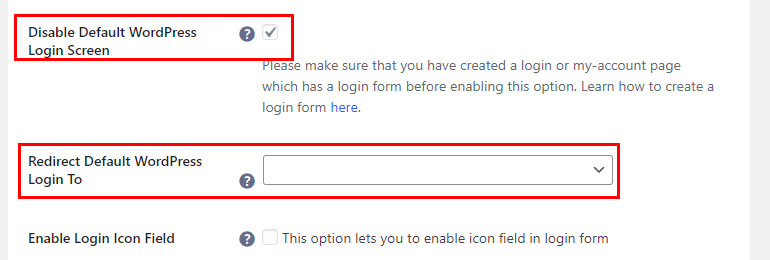
A new option called Redirect Default WordPress Login To. In our case, we want users to log in through the page we created in the previous step.
So, select the custom login page from the dropdown. Finally, scroll down and Save Changes.
That’s it! Users will now see the custom login page instead of the default one while signing in.
Step 4: Configure Available Login Options
Besides creating a custom login page and replacing the default login page with it, you can do much more with User Registration.
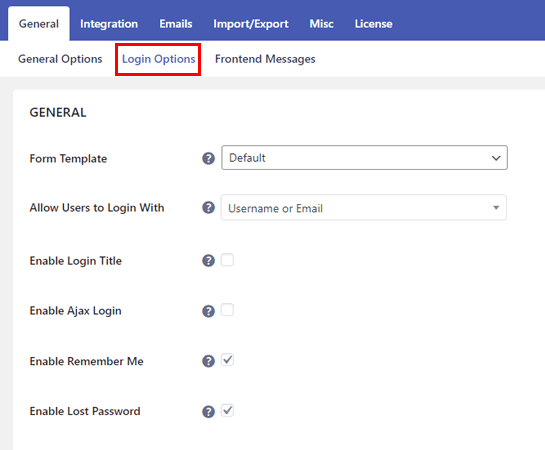
You’ll find several login options under User Registration >> Settings >> Login Options. Here, you can select a Form Template, Enable Ajax Login, Enable Captcha, etc.
Furthermore, you can customize the labels for each field in the login form, such as Username or Email, Password, etc.
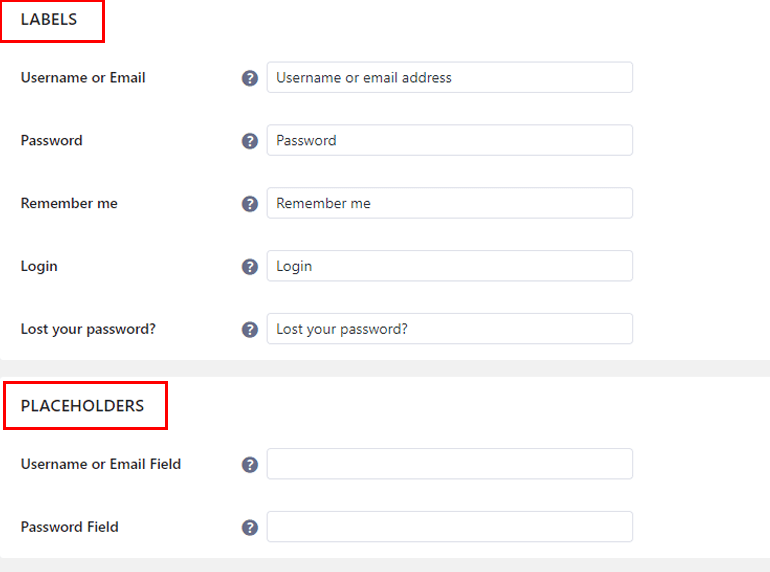
Similarly, the plugin lets you edit the placeholders for the fields.
You can even customize the front-end messages for cases like Empty Password, Unknown Email, Invalid/Unknown Username, etc.
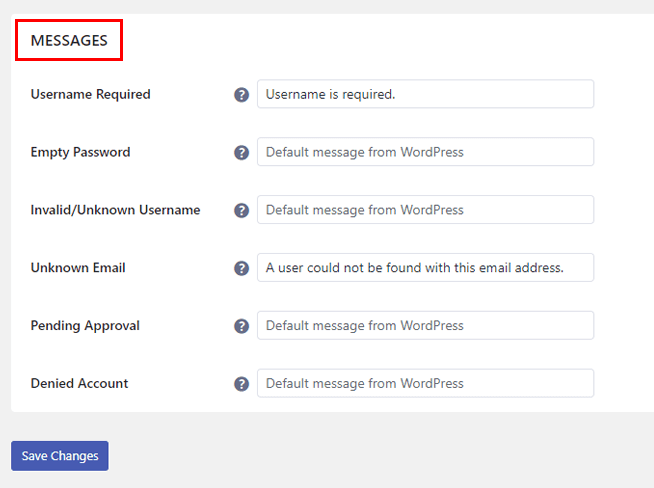
These are the available global settings for the User Registration login page.
Besides that, you can set up User Approval and Login option for individual registration forms.
To find this option, open the registration form you want to edit and go to its Form Settings >> General tab.

You can approve users with the following methods:
- Auto approval and manual login
- Auto approval and auto login
- Admin approval
- Auto approval after email confirmation
- Admin approval after email confirmation
When you’re done, hit the Update form button at the top.
E. What are Common Login Issues & How to Solve Them?
As you work with WordPress, you’re bound to face issues now and then. Likewise, you might encounter some common login page issues.
Let’s discuss these common problems and their easy fixes below:
1. Incorrect Password (Lost/Forgotten)
Lost or forgotten passwords are a common occurrence. You must have forgotten or misplaced your passwords more often than not.
In such cases, a user won’t be able to log into their website. The login page displays a notice informing you that your entered password is incorrect.
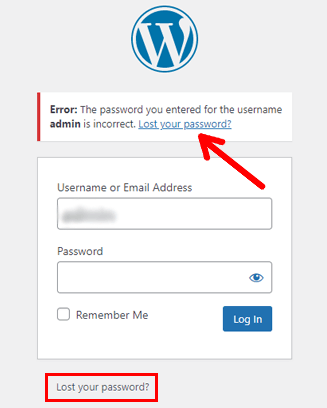
But the fix is super simple. In the same notice, you’ll find a link called Lost your password? It’s also present at the bottom of the login form.
All you need to do is follow the link and provide your email address. You’ll receive a link in your inbox to set up a new password in no time!
2. Disabled WordPress Login
This issue is common in websites protected by limiting login attempts.
So, you try to log in to your site with the wrong credentials. In that case, WordPress disables the login after a specific number of attempts.
Although it’s meant to protect you from brute force attacks, it might lock you out of your own website.
But you don’t have to worry since the disabling is temporary. You’ll be able to log in again after a specific time.
If you’ve lost your password, follow the steps in the previous section and recover your password first. Then, log in using the correct credentials.
3. WordPress Login Failed Due to Redirection
What if you enter all the correct credentials, but WordPress still redirects you back to the login page?
This kind of redirect leaves you in an indefinite loop of trying to log in and ending back on the login page.
So to solve this issue, clear your browser cache and cookies. You can also restore the default .htaccess file.
Besides that, check for corrupted themes and plugins and deactivate or delete them if you find any.
4. Database Connection Error
Sometimes, users won’t be able to log in because of database connection errors.
Such an error means that your website has failed to establish a connection with its database due to heavy traffic or corrupted files.
There are two ways to fix this problem. First, you can repair your database using plugins like Advanced Database Cleaner.
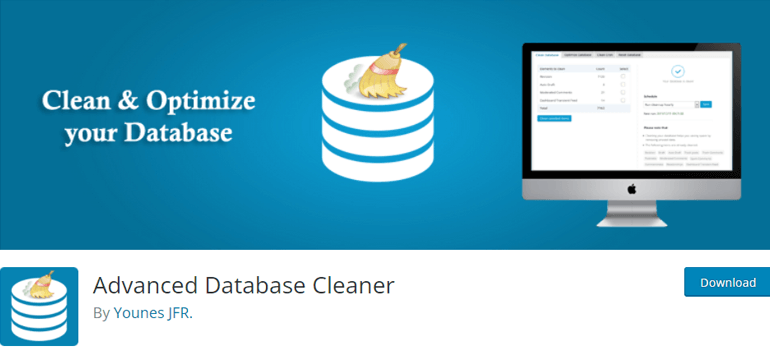
However, if the corruption is too severe, you might need to create a new database.
Wrapping Up
That wraps up our article on how to find and manage your WordPress login URL.
By now, you know that the login URL is very easy to find since most main website login URLs follow the same format:
www.example.com/wp-admin
Besides that, we also discussed the ways to find the login page for subdomain and subdirectory websites. Plus, you’re ready to implement all the ways you can secure your login page and solve common login issues.
Most importantly, we’ve explored the step-by-step process of creating a custom login page URL for your website using the User Registration plugin.
However, you can use this feature-rich plugin for so much more. For instance, you can block user registration spam, add profile picture to WordPress users, and more.
Read more on User Registration and its features on our blog. For video tutorials, head over to our YouTube channel and subscribe!
Also, follow us on Twitter and Facebook to stay updated.



![Zakra 3.0 | Zakra Pro 2.0 Release [Major Updates!]](https://i.ytimg.com/vi/g3rifl7kWvg/maxresdefault.jpg)