Are you wondering how to add a profile picture to a WordPress user? Do you want to add an avatar to user profiles on your WordPress site? If your response is yes, then you’re at the right place.
When you browse a website, you’ll come across users with profile pictures next to their names. They’re also called avatars.
For such profile pictures or avatars to appear on your user’s profile as well, you’ll need to learn how to add profile picture to WordPress user. So, in this article, we’ve mentioned everything about how to change profile picture on WordPress and how to add image upload to user profile.
Before we get into that, let’s talk about why you should add a profile picture to a WordPress user.
Reasons to Add a Profile Picture to a WordPress User
We’re more likely to connect and retrieve information from visual representation rather than textual information. And same goes for WordPress websites as well. Apart from the images for the content, the user’s profile picture also highly impacts the audience.
When you add a profile picture to the users on your site, your audience feels more eager to connect to one another while engaging with your content. Social networking platforms like Instagram and Facebook are examples of how people have formed a great connection like this.
And fortunately, WordPress also lets you add a profile picture to the users of your site. Besides, the author and user profile in WordPress also provides credibility to the audience as it indicates the author and the users to be genuine content creators or consumers.
However, adding an avatar to a user profile in WordPress is not compulsory. But when you do add avatars, they enhance your site’s appearance.
Hence, the profile picture highly benefits your WordPress site, and it’s better to use them.
Having said that, there are three easy ways to add an avatar to a user profile in WordPress. Let’s explore them in detail below.
How to Add Profile Picture to WordPress User? (3 Easy Ways)
1) Using the Default WordPress Gravatar
Gravatar (Globally Recognized Avatar) is a platform for uploading images in one place so that you can use them across various websites as an avatar.
For your convenience, WordPress has integrated Gravatar into its system to let the user add their Gravatar as their profile picture on your site.
To use Gravatar’s profile picture in WordPress, first, you need to visit gravatar.com and sign in using your WordPress account or click on Create your Gravatar to create a new account.
From the Gravatar dashboard, you can select the email address for which you’ll be using the image as a profile picture.
After creating an account, you can upload the image and go through steps like editing the image and providing image rating as guided by Gravatar.
When you comment on your post or any post across the web that supports Gravatar, the same picture or avatar appears by the side of comments or any other activities you perform on the website. But you have to use the same email address associated with Gravatar.
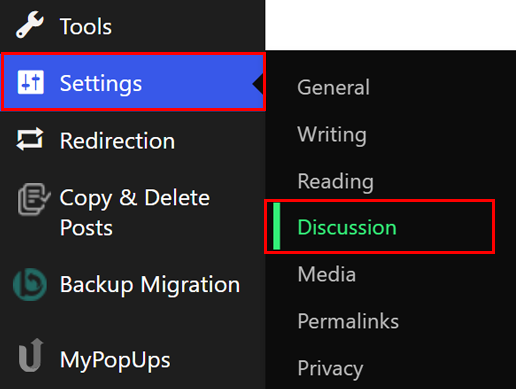
Besides Gravatar, as the admin of your website, you can configure avatar options for your users as well. Simply log in to your WordPress site’s Dashboard and navigate Settings >> Discussion.
Scroll down below until you reach the Avatar section.
The Default Avatar section allows you to choose the image you want to display when the user comments on the comment section.
The Default Avatar is for those who do not have a Gravatar account; it displays a generic logo for the user as the profile picture. As the picture depicts, the Mystery Person shows the person’s outline as the profile picture, the Blank option leaves the profile blank, and the Gravatar Logo shows its logo as the profile picture.
Besides that, the icons that have (Generated) at the end of their label provide you with the auto-generated image without requiring you to create a Gravatar account. It takes the commentator’s email and links to the auto-generated picture. Hence, when identical users comment on your site, they will have the same unique profile picture next to their name.
But not every user likes to use Gravatar to add an avatar to a user profile in WordPress. As the process is lengthy, they’re likely to look for alternatives.
So, there are two other ways that you can use to add image upload to user profile in WordPress from the same website. Let’s explore them both below.
2) Upload Profile Pictures from Front-end Registration Forms
Using front-end registration forms, users can easily add avatars to user profiles in WordPress. Simply, add the profile upload field on the registration form, and users can add an avatar to their user profile. And to show how it actually works, we have chosen the best plugin – User Registration.

User Registration is a top choice when it comes to WordPress registration form plugins. It’s user-friendly, making the creation of user registration forms super easy. And you won’t even require any coding knowledge.
At the same time, you can let a user add an avatar to their user profile through the custom registration form you’ve created with this plugin.
After going through the below-mentioned steps, you’ll learn how to effortlessly add a profile picture to a WordPress user.
i. Install User Registration Pro and Advanced Fields Add-on
First of all, you must buy the premium version of User Registration. To use User Registration in WordPress for letting users add avatars to the user profile, you’ll also require the Advanced Fields add-on. That’s because this add-on comes with the Profile Picture form field, which is unavailable in the free version.
So, among the three plans for User Registration premium: personal, plus, and professional, you can use any of them. The price starts at $69 per year.
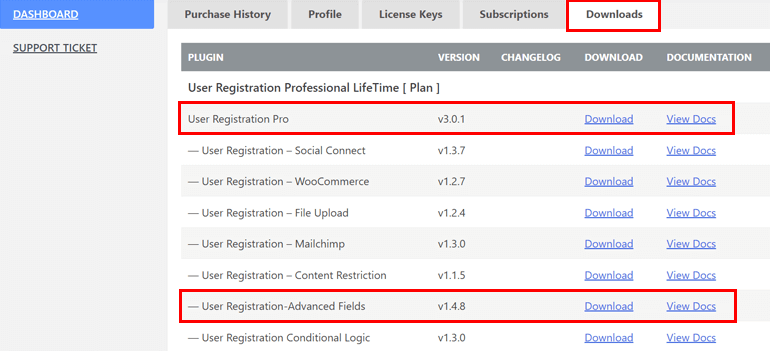
Complete the transaction by visiting wpuserregistration.com and creating an account. Then, sign in with the same account and go to the Dashboard >> Downloads.
Now, download the User Registration Pro file and the User Registration – Advanced Fields file.
So now, you have everything you’ll require to add image upload to the user profile in your WordPress site.
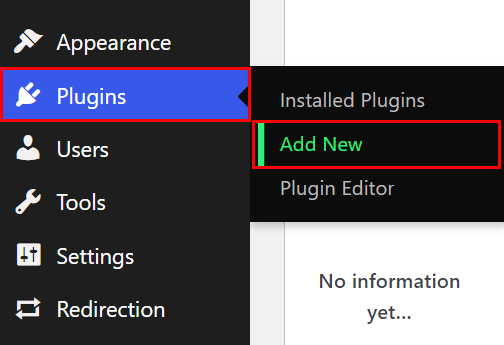
Next, log into your WordPress Dashboard. From here, click on the Plugins >> Add New.
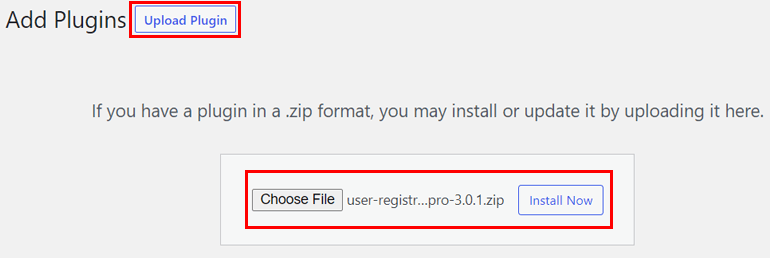
It will now take you to the new page with plugins. Click on the Upload Plugin at the top and choose the file for User Registration Pro, which you’ve downloaded. Install and Activate the plugin as well.
After you activate the plugin, you’ll see a setup message like below.

Click on the Install User Registration Pages button. Thus, your site now has User Registration (Pro) along with its pages.
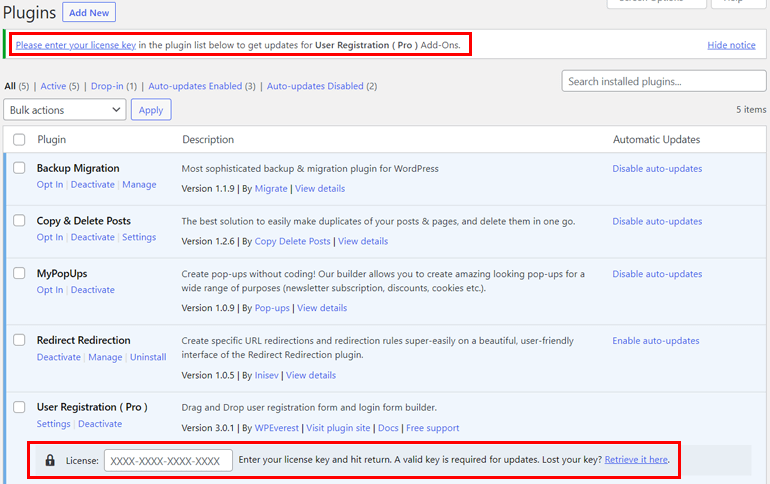
You’ll now require to enter the license key for the User Registration (Pro) plugin. The license key for the plugin is available in the User Registration dashboard under the License Keys tab. Just copy the license key and enter it in the field under User Registration (Pro) after the activation of the plugin.
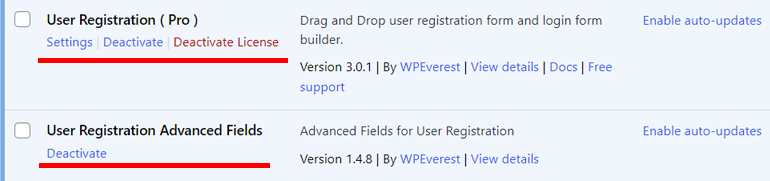
Simultaneously, install and activate User Registration Advanced Fields in the same manner.
Therefore, your WordPress site now has two plugins installed:
ii. Create a New Registration Form with Profile Picture Field
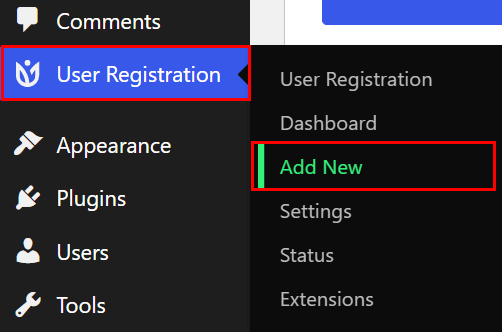
After this, let’s move on towards building the form. So, go to User Registration >> Add New first.
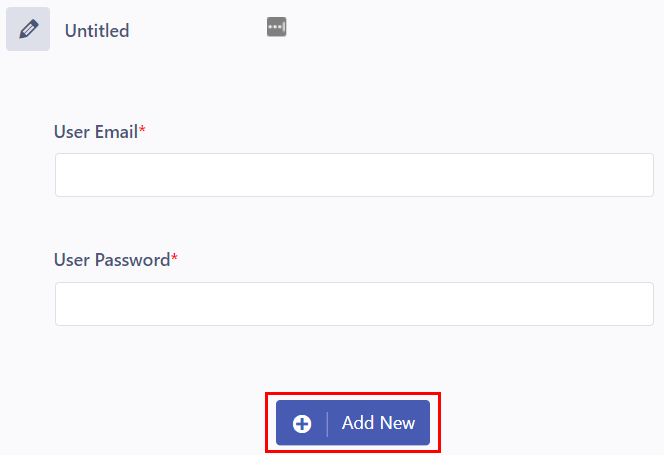
You’ll see the interface of User Registration, which looks like this.
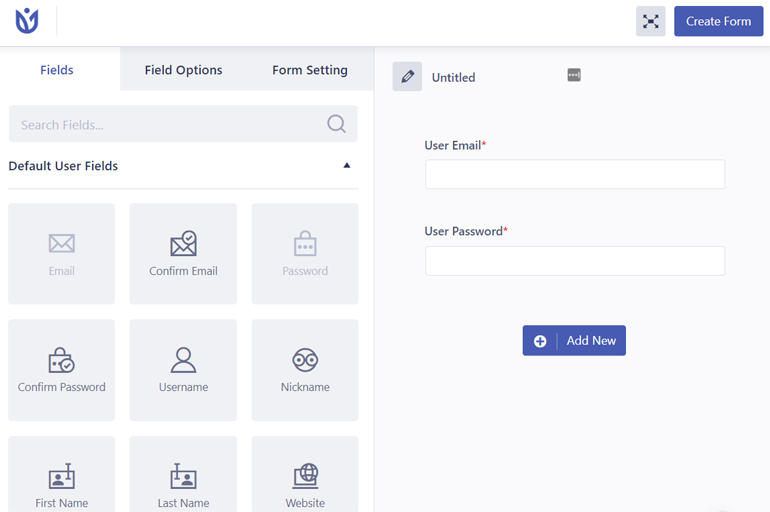
Click on the Add New button on the right side and add the required field using drag and drop.
Next, to add the profile upload field in your user registration form, scroll down below the Fields until you find Advanced Fields.
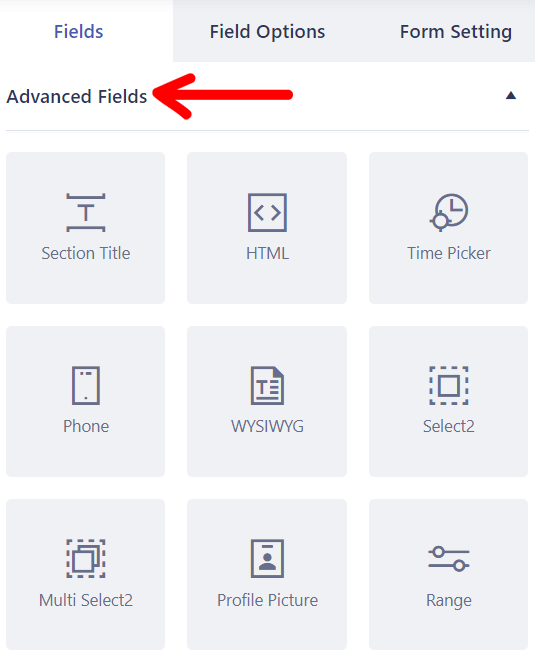
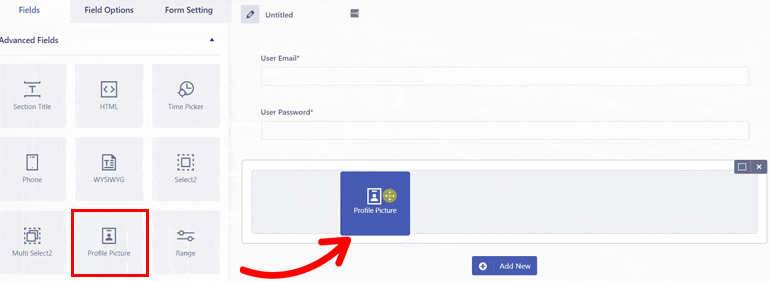
From here, drag and drop the Profile Picture field into your form.
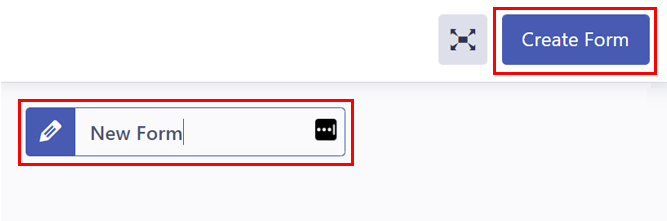
After adding all the required fields, name the form and click on Create Form.
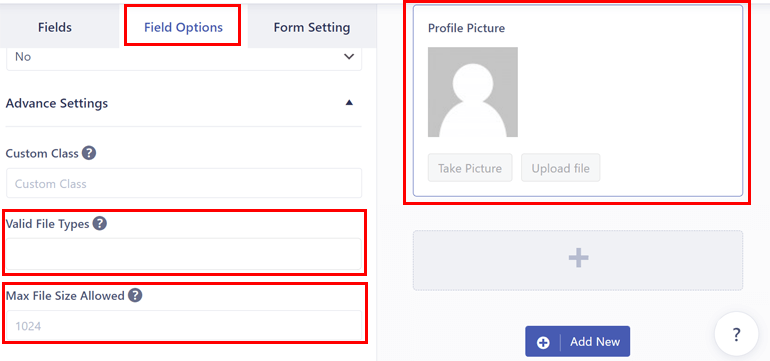
Furthermore, you can customize the options for the Profile Picture field through its Field Options. The Field Options has General and Advance Settings.
You can edit the label and add a description to the form’s fields from the General Settings. It also has the option of hiding the label.
On the other hand, Advance Settings lets you add custom classes for the fields. You can also set valid file types and the maximum size for the image from the Advance Settings.
For that, click on the Profile Picture field of your form; the field options immediately show you the available options. Scroll down to find the Valid File Types and Max File Size Allowed. Now, set them as per your choice.
Likewise, you’re able to customize the General and Advance Settings for all other fields alongside Profile Picture.
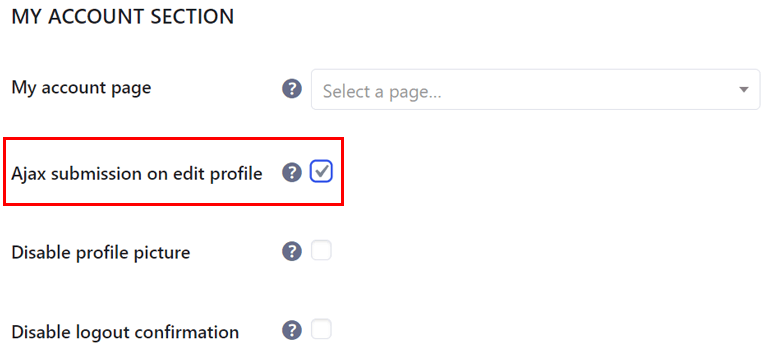
Besides that, you can go to the Settings under User Registration for further settings.
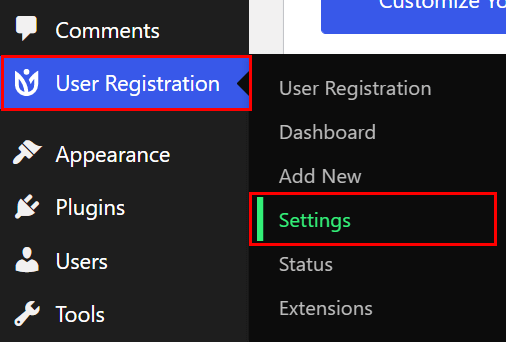
For instance, you can prevent dashboard access to specified users, choose the user login option, add the allowed domains, and so on. Also, make sure that you enable the Ajax submission on edit profile. After you’re done, don’t forget to save the changes you make.
iii. Place the Registration Form on Your WordPress Website
To add the user registration form with the profile picture field to your post or page, open the desired page or post. Go to the block editor and press [+] to add the form.

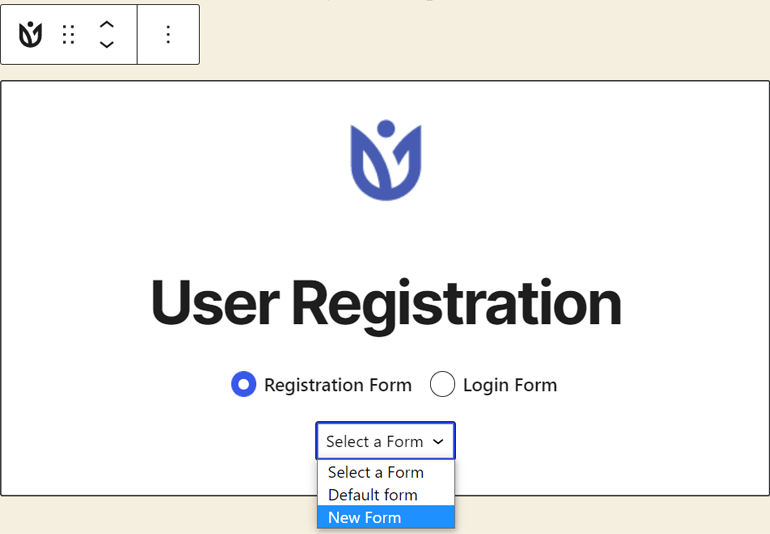
From the search bar, search for the User Registration block.
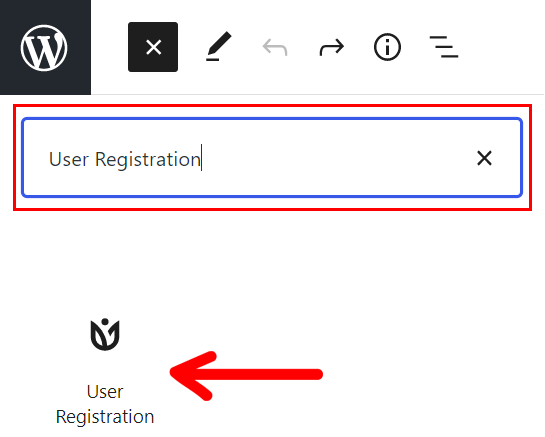
Once you choose it, you’ll see the block appear on your post. So, from there, select the form that you just created using the dropdown button.
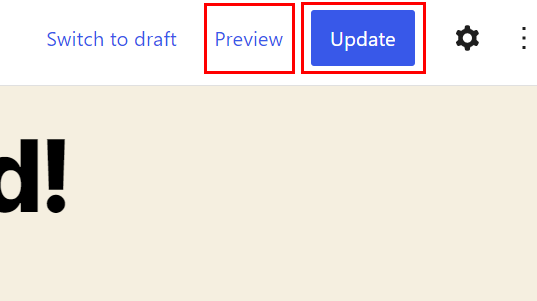
Update the post and Preview to see how it actually looks.
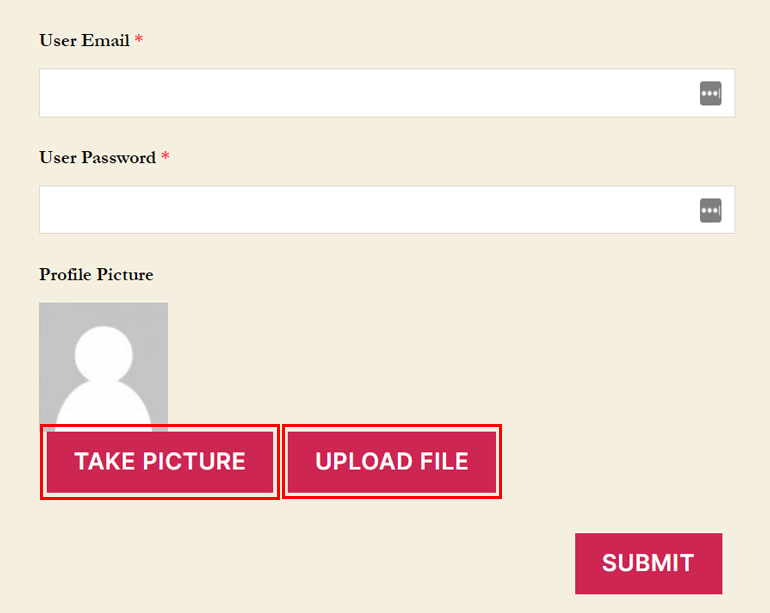
The form might look like this on the webpage. Remember that the appearance will vary based on the WordPress theme you’re using on your website.

Here, users can easily upload the file by clicking on UPLOAD FILE. Also, they can click on TAKE PICTURE to take pictures using the webcam.
Furthermore, once the user is registered using the User Registration form, they can also upload the profile picture from the edit-profile tab of the My Account page.
But they must log in to their account using the same email address and the password they created before submitting their profile picture.
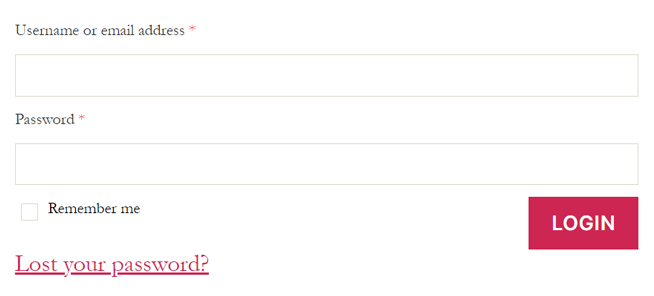
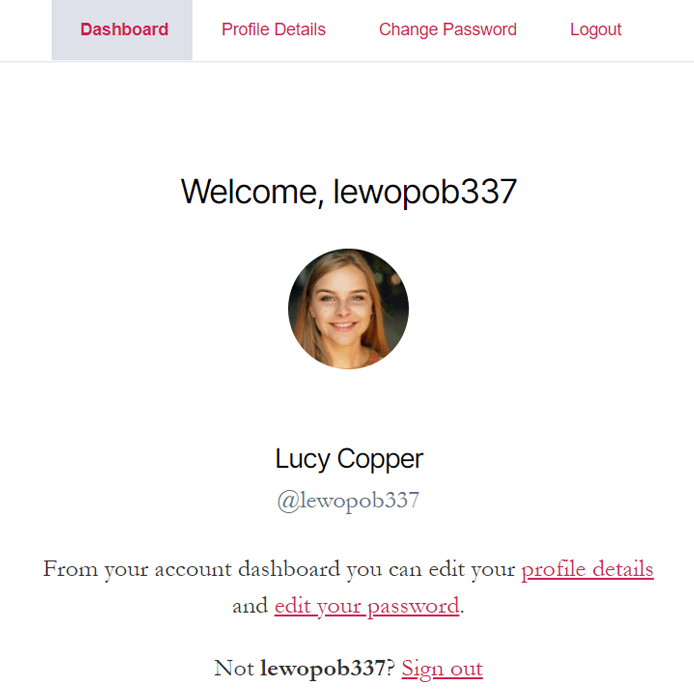
Once they log in, a new dashboard for the user appears like below:
Next, they can click on the Profile Details and use the REMOVE button to upload a new image.
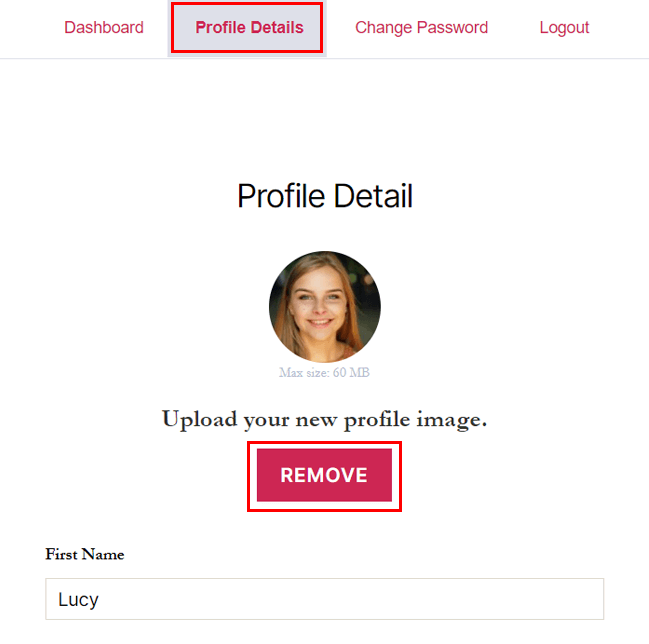
The user again gets two options for uploading the image: uploading the file or clicking the picture using a web camera.
Once they Save the changes, the new profile picture appears next to their name for their web activity on your site.
And that’s all for using User Registration in WordPress to add image upload to the user profile. Let’s now move on to another way.
3) Upload Avatars from the Dashboard using Avatar Plugins
The next method of adding a profile picture to WordPress users is, uploading the avatars from the dashboard using plugins. When you install these plugins, you can use the avatar of your choice for the users.
So, here we’ve mentioned some of the plugins that are highly useful for uploading avatars for your users from the WordPress dashboard.
i) One User Avatar
One User Avatar allows you to upload a profile picture in your media library and use it as the default avatar for the users who don’t have a Gravatar account. On the other hand, you can limit subscribers’ and contributors’ file size and dimensions.
You also get the option to use only the local avatars by disabling Gravatar. Besides that, you can add the uploader shortcode for the logged-in users as a widget, enabling them to upload their own avatar. Also, remember that the uploader is visible to logged-in users only at the front-end.
Key Features
- Compatible with any WordPress theme
- Allows to change HTML wrapper
- Works with bbPress
- Admin can view the avatar thumbnails for the user list table
- Function available to retrieve just the image URL
Price: Free
ii) Simple Local Avatars
As the name implies, Simple Local Avatars is a simple plugin using which you can add an avatar upload field to the user profile in WordPress. It generates the size demand on request just like Gravatar and allows cropping of the picture. Similarly, you can store the images on the upload folder where all of your other media exist using the plugin.
On top of that, the simple and native interface makes it easy to use the plugin. In addition, it also fully supports the default avatar and Gravatar. And, just like Gravatar, it enables the rating of the local avatars.
Key Features
- Supports jpg, gif, png, bmp, and tif images
- REST API support
- Supports front end avatar uploads
- Translated into 13 locales
- Good documentation
Price: Free
iii) Basic User Avatars
Basic User Avatars is a user-friendly plugin that allows you to add a custom profile picture to WordPress user by adding an avatar upload field. It’s also compatible with other popular plugins that use user registration on the front-end for profile management.
At the same time, you can disallow the user to update their profile picture using the Settings of your Dashboard. You can then allow them to only upload the file.
Although the plugin is known for uploading avatars from the dashboard, it also enables you to use the front-end for avatar management and avoid giving users access to the dashboard.
Key Features
- Seamless migration from WP User Avatar plugin
- Compatible with other popular plugins
- Automatically added bbPress support
- SSL support
- Completely free
Price: Free
Wrapping Up
Considering how important profile pictures are in creating an engaging experience for your users, you must add profile pictures to your website users as well.
Fortunately, WordPress has three easy ways to add avatars to the user profile: using Gravatar, with the User Registration plugin, or using WordPress avatar plugins.
However, we recommend you use User Registration to add avatar to the user profile to avoid Gravatar’s limitations. User Registration lets your users upload their images as profile pictures through engaging registration forms. That’s all on how to change profile picture on WordPress.
But, don’t stop here. Learn how to create a signup form and a donation form to place on your WordPress website next. Or, you can also visit our blog to read more articles, including tutorials for WordPress.


![Zakra 3.0 | Zakra Pro 2.0 Release [Major Updates!]](https://i.ytimg.com/vi/g3rifl7kWvg/maxresdefault.jpg)