A registration form is an integral part of any website. And, it can get complex and lengthy while you try to integrate all the necessary fields into the form. The active participation of the visitors on the registration form can decrease drastically because of this. But, what’s the solution? The answer to this is creating a multi step registration form.
No need to worry if you don’t know how to create one yet. In this WPEverest Article, you’ll learn how to create a multi step registration form, and why it is important for your site.
Why create a Multi Step Registration Form?
It is highly likely that users will get bored and quit if the forms are too long and complicated. It is the job of every website owner to make their site as user-friendly as possible. And, lengthy registration forms are not the way to go.
Therefore, the easiest way to create a user-friendly, attractive yet informative registration form is by dividing the form into parts. And, that’s what a multi step form does. It allows you to split your lengthly registration form into as many parts as you want.
Also, you can customize the multi step registration form according to your liking. This allows you to create engaging and intuitive registration forms for your site. This not only removes the complexity for the users but also allows the website owner to properly manage their registration forms.
With a WordPress plugin, creating a Multi step registration form is extremely easy. We will be using the User Registration plugin which the best registration form plugin out there.
User Registration Plugin
When it comes to WordPress registration, User Registration is the best choice for all the website owners. The drag-and-drop form builder allows you to create registration forms with required form fields. Also, the plugin is highly extendible with 16 paid extensions.
One of which is Multi-Part Form add-on. It allows you to create a multi step registration form effortlessly. Also, you can customize your multi step form according to your site’s requirements. User Registration Multi Part add-on has an extremely user-friendly and clean interface.
For more details on the prices, you can check out the Plans and Pricing page, and choose the best plan for you.

How to Create a Multi Step Registration Form?
After you install both the User Registration plugin and Multi-Part Forms add-on, you can start creating your first multi step registration form.
To create a new form, go to User Registration -> Add New. Here, you can see the easy-to-use form builder where you can insert required form fields just by dragging and dropping them.
Also, you can check this out for beginner’s guide on creating a registration form with User Registration.
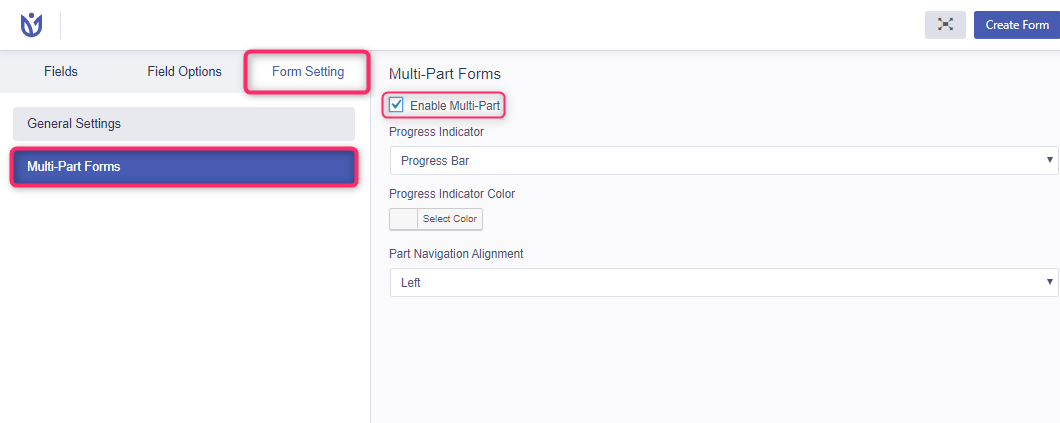
1. Enable Multi-Part Forms
To activate the multi part forms feature, go to the Form Settings option on the form builder. Now, click on the Multi-Part Forms tab then, Enable Multi-Part option.
2. Customizing the Multi Step Registration Form
After you enable the Multi Part Forms option, you’ll find three settings to customize your multi step form.
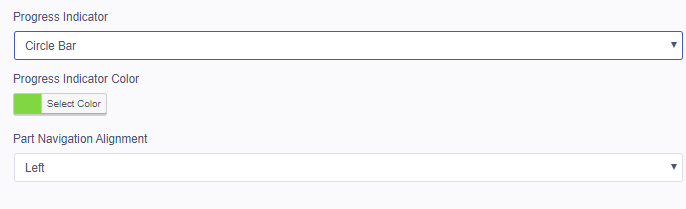
Progress Indicator
With this option, you can change the type of indicator for your multi part registration form. There are three types to choose from here: Progress Bar, Circle Bar and Arrow Steps.
Progress Indicator Color
This allows you to choose a color for the multi part registration form. So, it is a great option to customize the multi-part color with the website’s theme color.
Part Navigation Alignment
The Part Navigation Alignment option allows you to choose where the navigation buttons appear in the form.
3. Add Multi Parts to the form
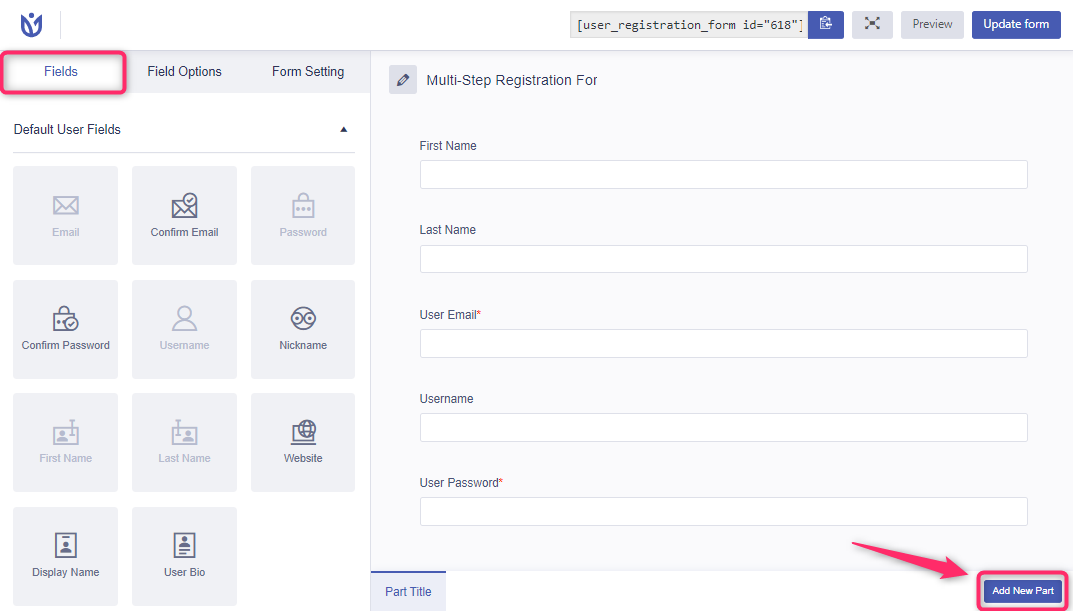
Once you’re done with the settings, you can create multi step registration forms with no trouble. Go to the Fields section in the form builder, and you can see the Add New Part button on the bottom right.
Click on the Add New Part button to add multiple parts to your registration form according to the number of fields you want to add.
4. Change Multi Part Page Options
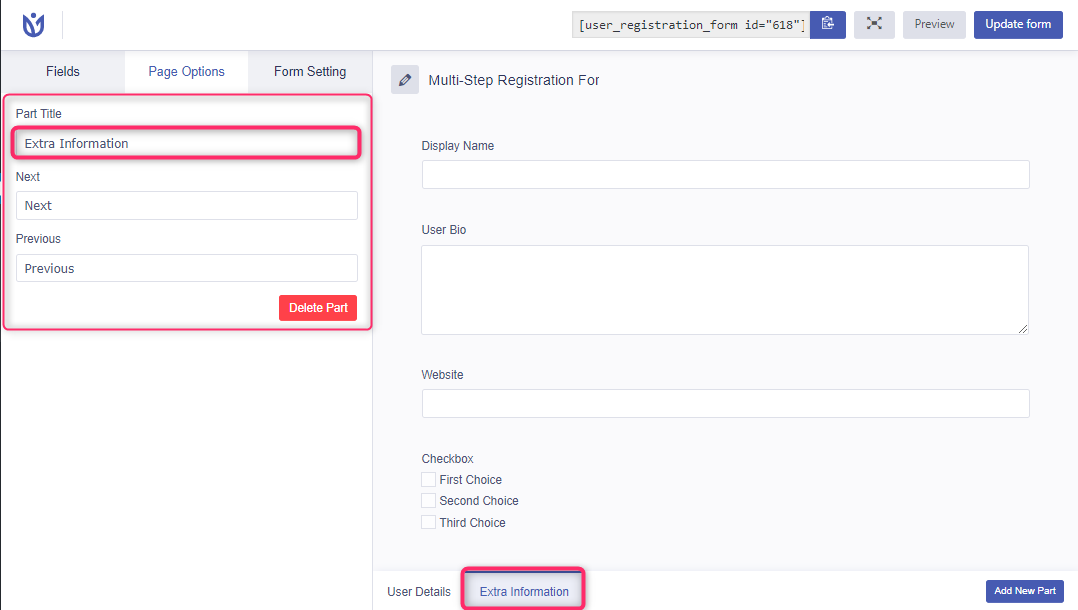
As you add new parts for your multi step registration form, you can also change the Part Title and Next/Previous text for each step.
For this, simply click on the multi-part that you want to change the texts. Then, the Page Options tab will be opened. Here, you can easily change the Part Title of each part individually. Also, you can change the text for the Next and Previous buttons of the multi step registration form.
Also, there is a Delete Part option for each part. So, you can delete if you don’t require the part later on.
5. Display Multi Step Registration Form
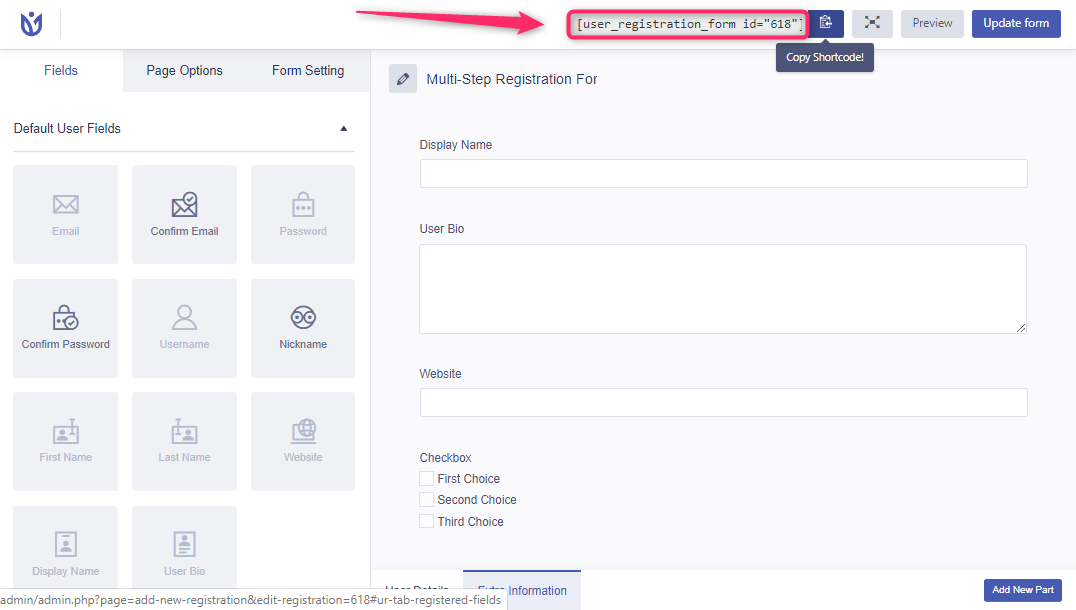
After you’re done creating the form, don’t forget to Update Form or Save Form if you haven’t already. Then, you can display the multi step registration form on your site. There are two ways to display the form.
First, you can copy and paste the shortcode provided for each form that you create in User Registration. Just paste the shortcode to any page or post on your site.
Secondly, you can use the User Registration block in the Gutenberg editor to insert the form. For this, go to your editor and search for the User Registration block.
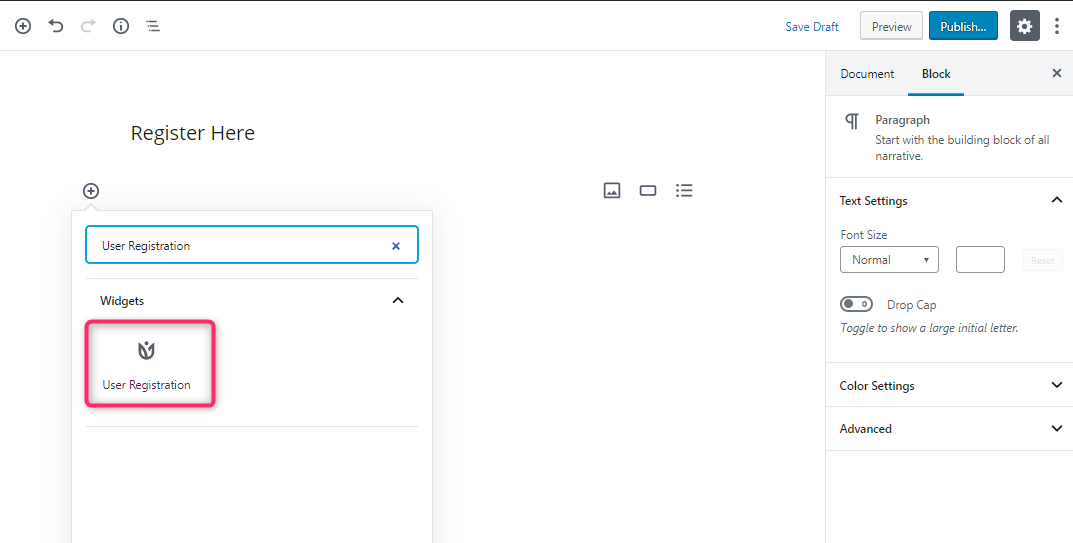
Then, select the multi step registration form that you created. Now, the form will be added to the page or post with form preview in the editor.
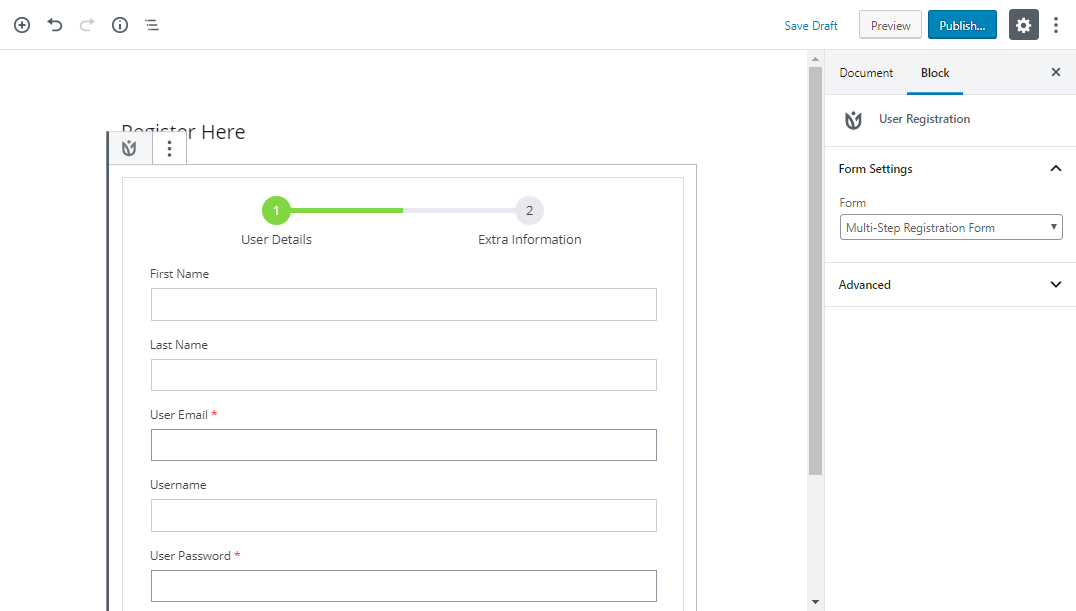
After you Publish the page or post on your site, your multi step registration form will look something like this.
To Summarize:
As you can see, creating a multi step registration form is such an easy job with the help of User Registration plugin. Dividing your extended registration form into multiple parts will make it more appealing for the users.
Eventually, the number of site visitors who register as users or members will increase. Thus, multi step registration forms beneficial for both the users and site owners.
Lastly, don’t forget to share the article if you found it helpful. Also, if you want more WordPress tutorials, you can check these articles.
- Create a WordPress Registration Form with File Upload Field
- Restrict Access to WordPress Pages and Post by User Roles
- Create a Custom Registration Form for LearnDash


![Zakra 3.0 | Zakra Pro 2.0 Release [Major Updates!]](https://i.ytimg.com/vi/g3rifl7kWvg/maxresdefault.jpg)