What do you do when you want your users to upload additional files while registering to your site? Simple! Just create a registration form with file upload field. If you don’t know how to create one yet then, fear not!
After reading this tutorial, you’ll learn how to create a file upload form in WordPress in no time.
What’s the use of a Registration Form with File Upload Field?
You may need to create a file upload form in WordPress for various purposes. Depending on the type of form you’re creating, you need to allow your users to attach files with the forms. And, making users send attachments through email separately is not productive at all. Additional information about the users except for personal details like name, number, email, etc. is required in many situations.
For example, if you want users to upload some files with personal information like resume or certifications then, you need to add an upload field to your registration form. Similarly, content-based files such as text, audio, images, and videos may be required too.
Therefore, you need to create a file upload registration form for these situations. To create one, follow the simple instructions listed below.
How to create a file upload registration form in WordPress?
Although there are various plugins for this purpose, we recommend our User Registration plugin.

User Registration is one of the best registration form plugins available. With our User Registration plugin, you can create a registration form with a file upload field with no trouble at all. To allow users to upload files in your registration forms, you need to get our premium File Upload addon first.

The File Upload add-on is available on all our plans.
If you want more details on the pricing, go to our Plans and Pricing page to choose the best plan for you.
1. Configure File Type
After you download and install both the User Registration and the File Upload addon, go to User Registration → Settings. Then, click on the File Uploads tab on the top.
In the File Uploads Settings, you can see two options: Valid File Types and Max File Size Allowed.
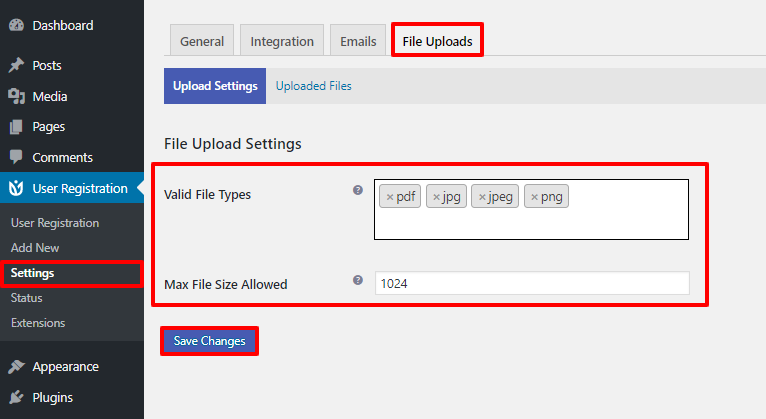
First, select the file types that you want to allow users to upload. User Registration allows you to upload the following file types: pdf, doc, docx, jpg, jpeg, gif, png, mp3
Secondly, set the maximum file size that you allow in your form. After you’re done, click on Save Changes.
2. Create a Registration Form
After that, go to User Registration → Add New. Now, all you need to do is drag and drop all the form field from the left-hand side of the form builder.

At the top, there are the Default User Fields which includes Email, Username, Website, and more. So, choose the fields that you require and, drag and drop in the form.
At the bottom, there are Extra Fields, which includes additional form fields such as Country, Textarea, Date, Checkbox, and more. Because you configured File Upload settings before, you can see the File Upload field is added there.
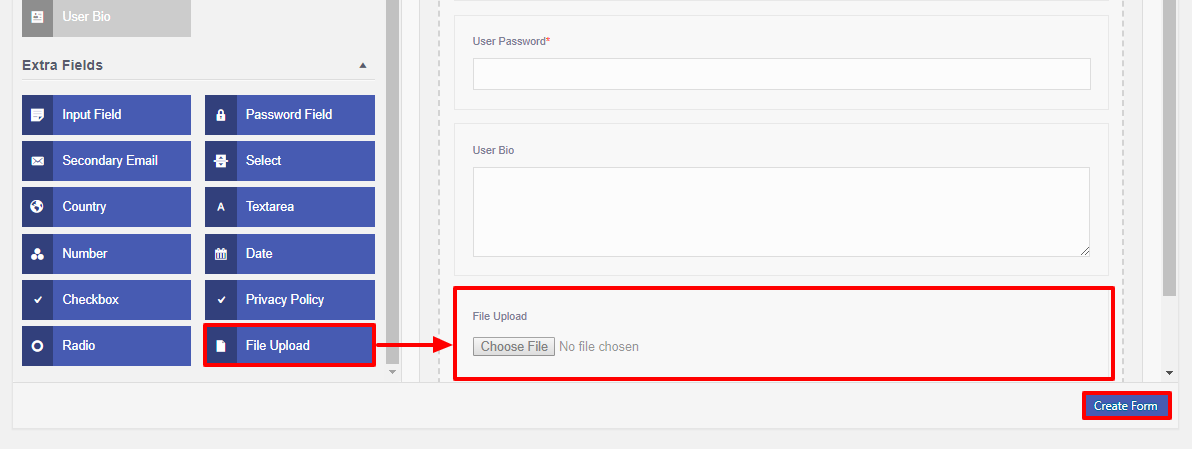
Drag and drop it to your form and click on Create Form. Your work is done!
3. Add File Upload Registration Form to your site
Go to Pages → Add New and click on the Add block icon. Then, search for User Registration block and click on it.
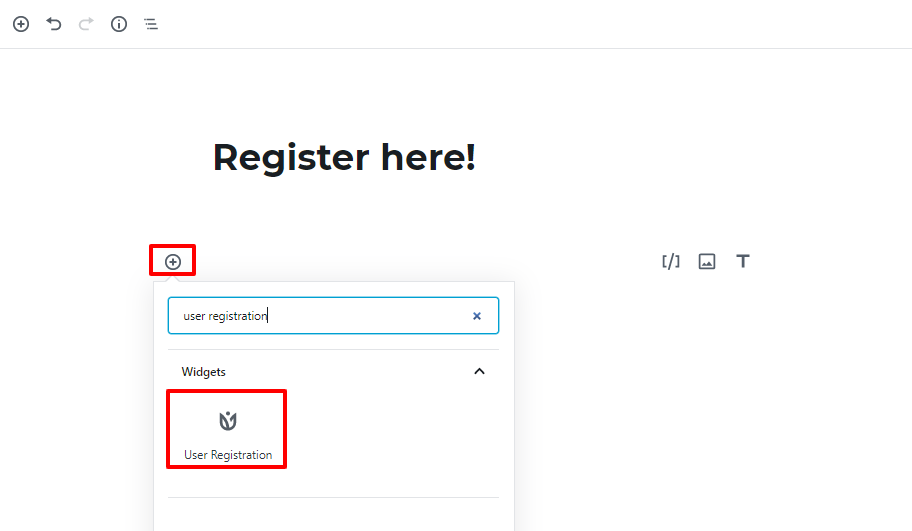
Now, select the form you want to add to your site.

In Classic editor
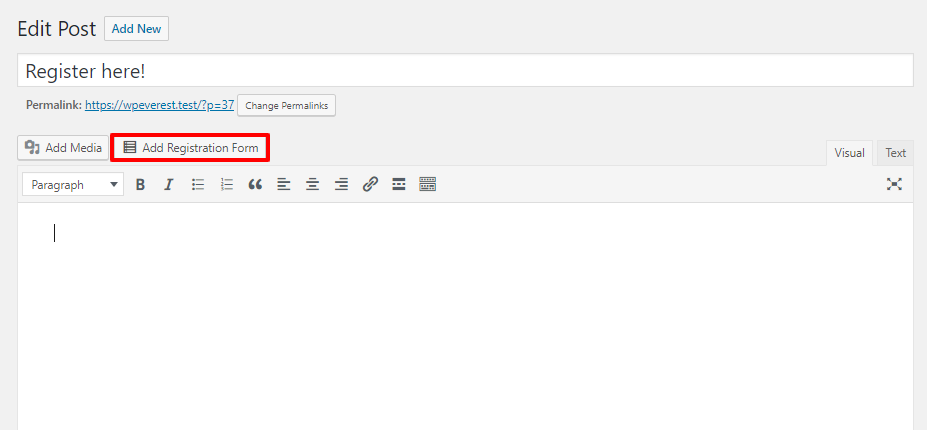
Click on the newly added Add Registration Form button on the top of the text editor. Then, select the form you want to add.

4. View or Download Attachments
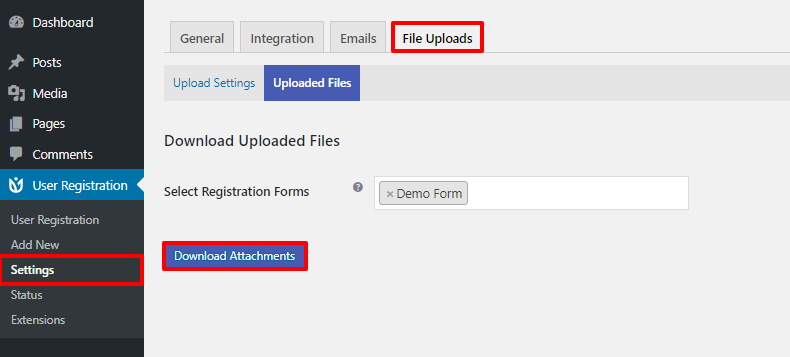
After you create a file upload form in WordPress and add it to your site, you can view the file uploads. Go to User Registration → Settings → File Uploads then, click on Uploaded Files.
Here, you can see all the files uploaded by users. To download any file, click on Download Attachments and all the attachments will be downloaded in a zip file.
Wrapping up:
Hence, it’s extremely easy to create a file upload registration form in WordPress with the help of our User Registration File Upload addon. Whether you want users to upload any documents or any media files, you can just create a simple file upload registration form.
Hope you found this tutorial helpful. Stay tuned for more articles like this and don’t forget to share!


![Zakra 3.0 | Zakra Pro 2.0 Release [Major Updates!]](https://i.ytimg.com/vi/g3rifl7kWvg/maxresdefault.jpg)